Trackers
Getting Started with chrt Trackers
Prerequisites
You will need to have a chrt account to use our trackers.
- Sign up for an account: chrt.com
- Learn about our available devices and pricing: chrt.com/trackers
- Request devices: trackers@chrt.com
How to Use Our Trackers
Whether you are attaching a tracker to an order or using it standalone, you can choose between doing so directly in our UI (at chrt.com) or using our API. The API docs are available here.
You can use chrt trackers in the following ways:
1. Attach to a chrt Order
When you create a chrt order, you can attach one or more trackers to one or more of the order’s cargo items.
To do this, simply click the “Link Tracker” button on the order’s details page.
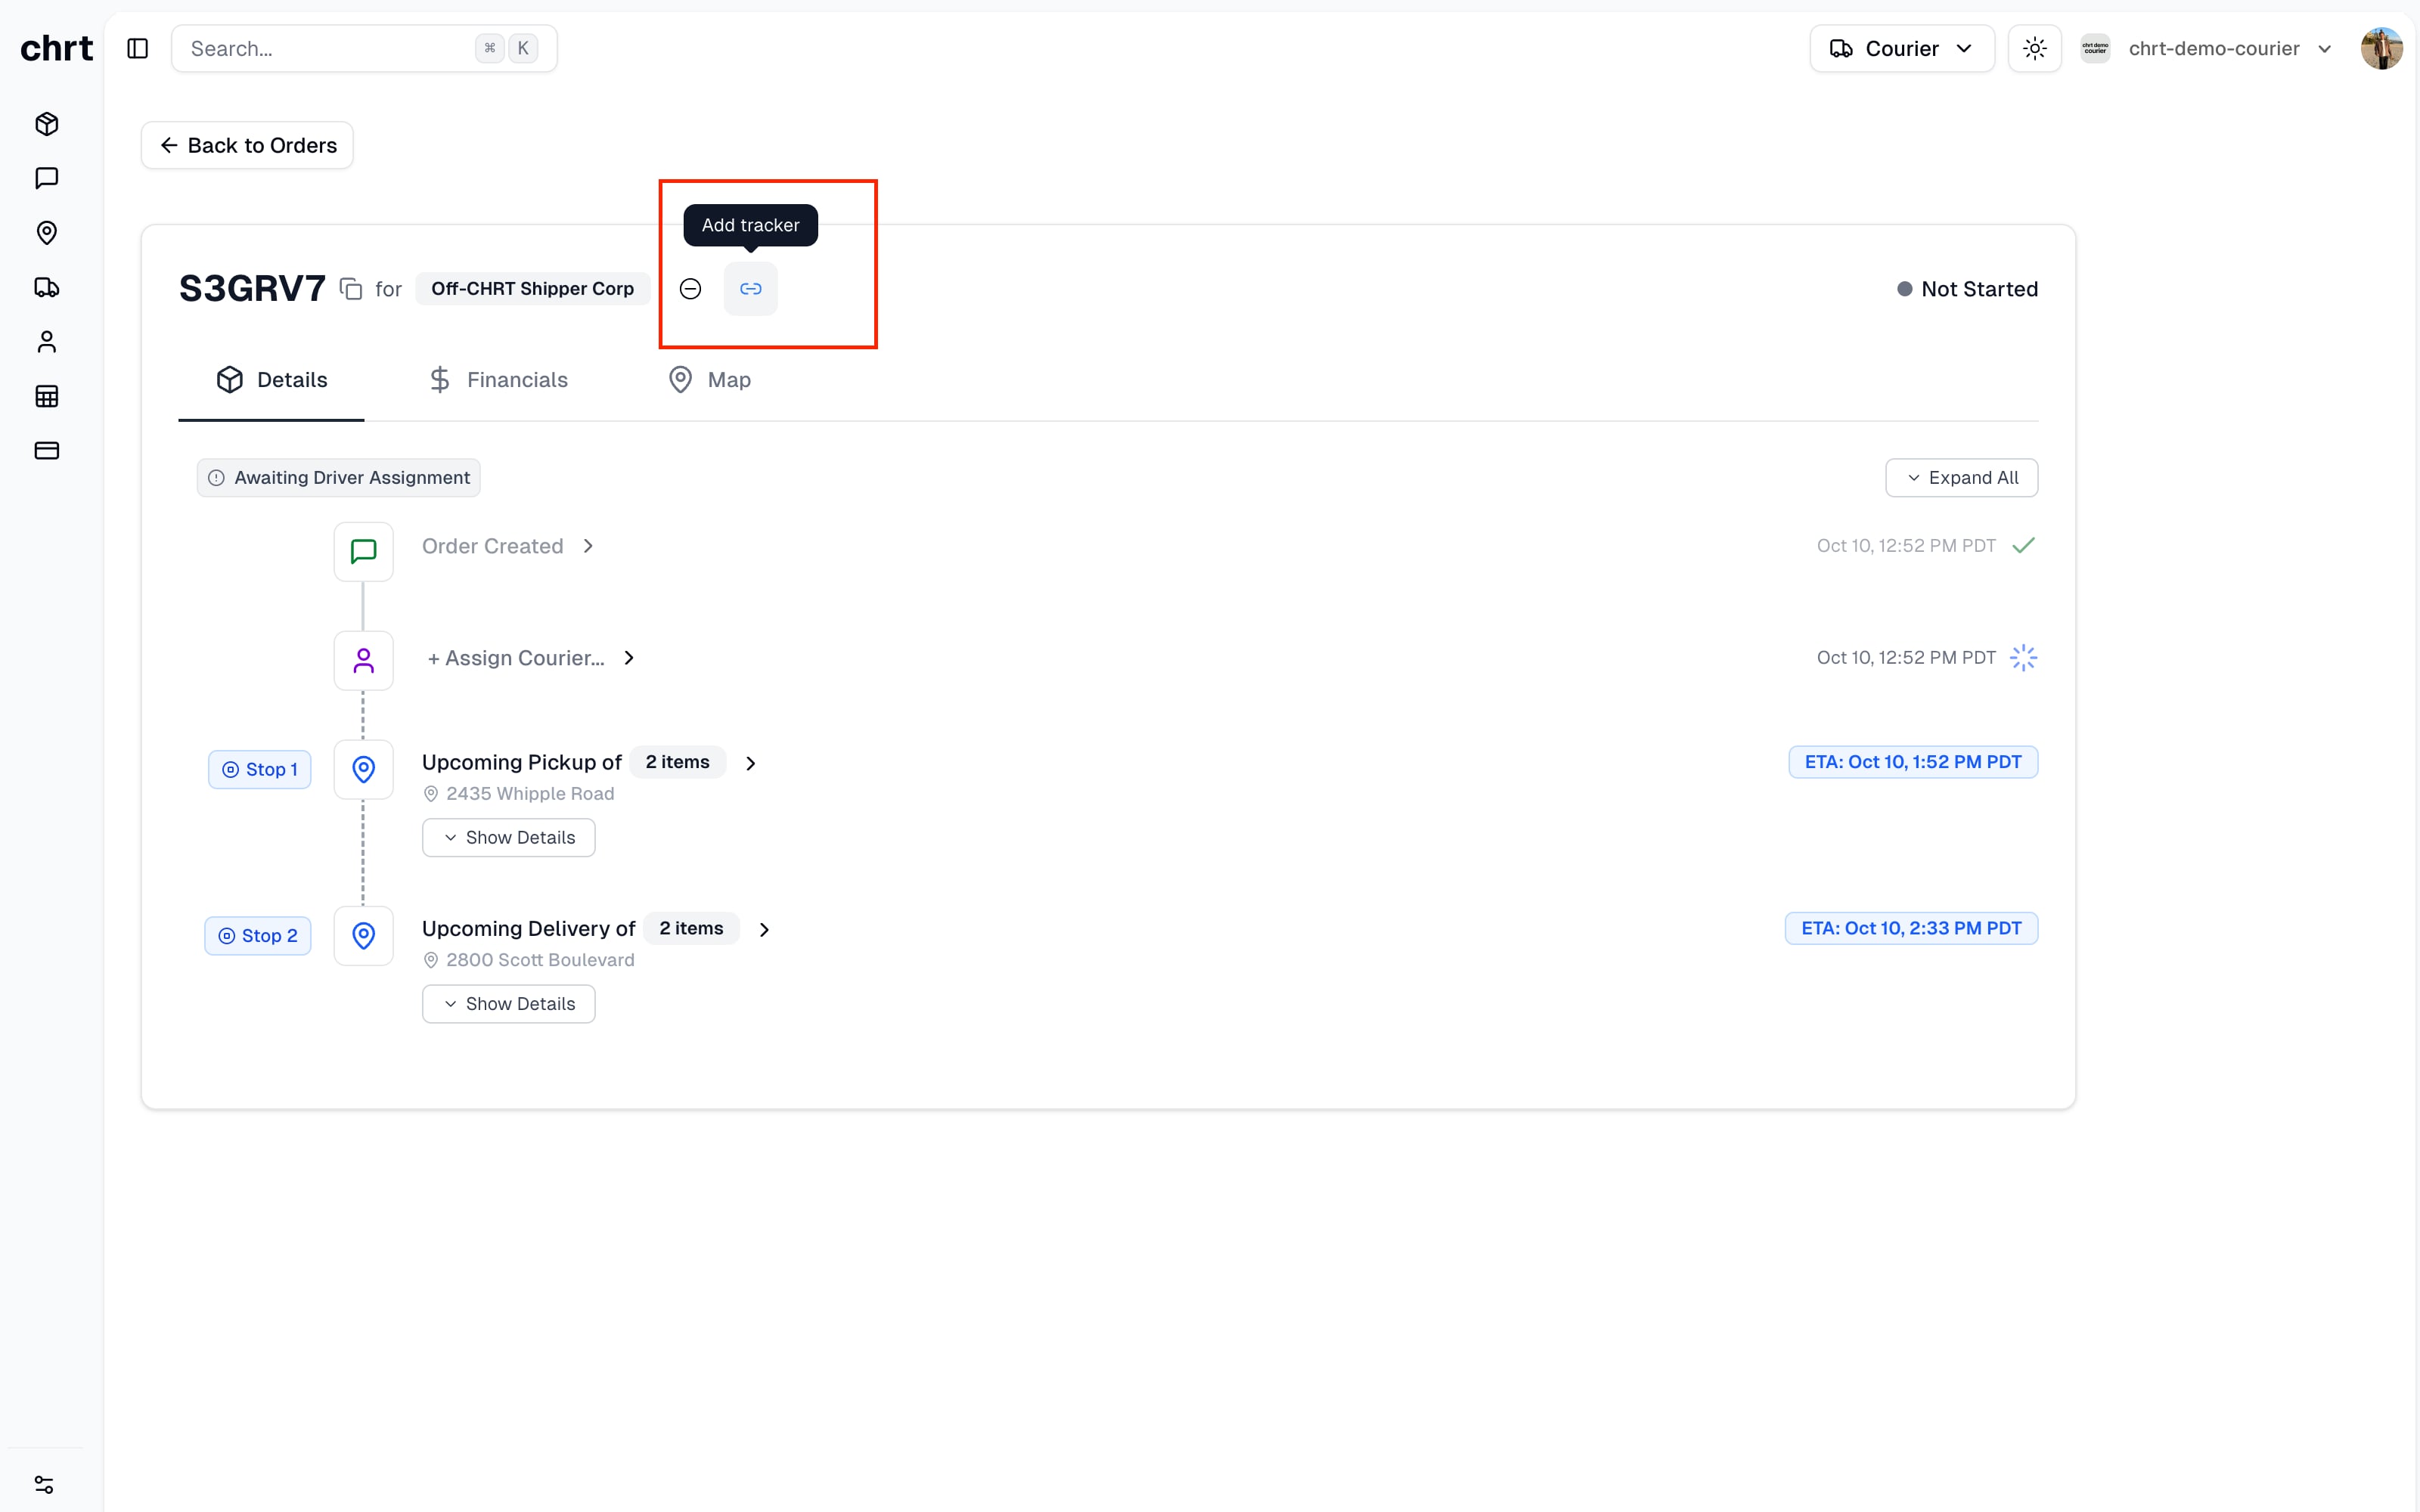
You will be prompted to enter the tracker’s ID (12 alphanumeric characters) and to select the cargo item you want to link it to.
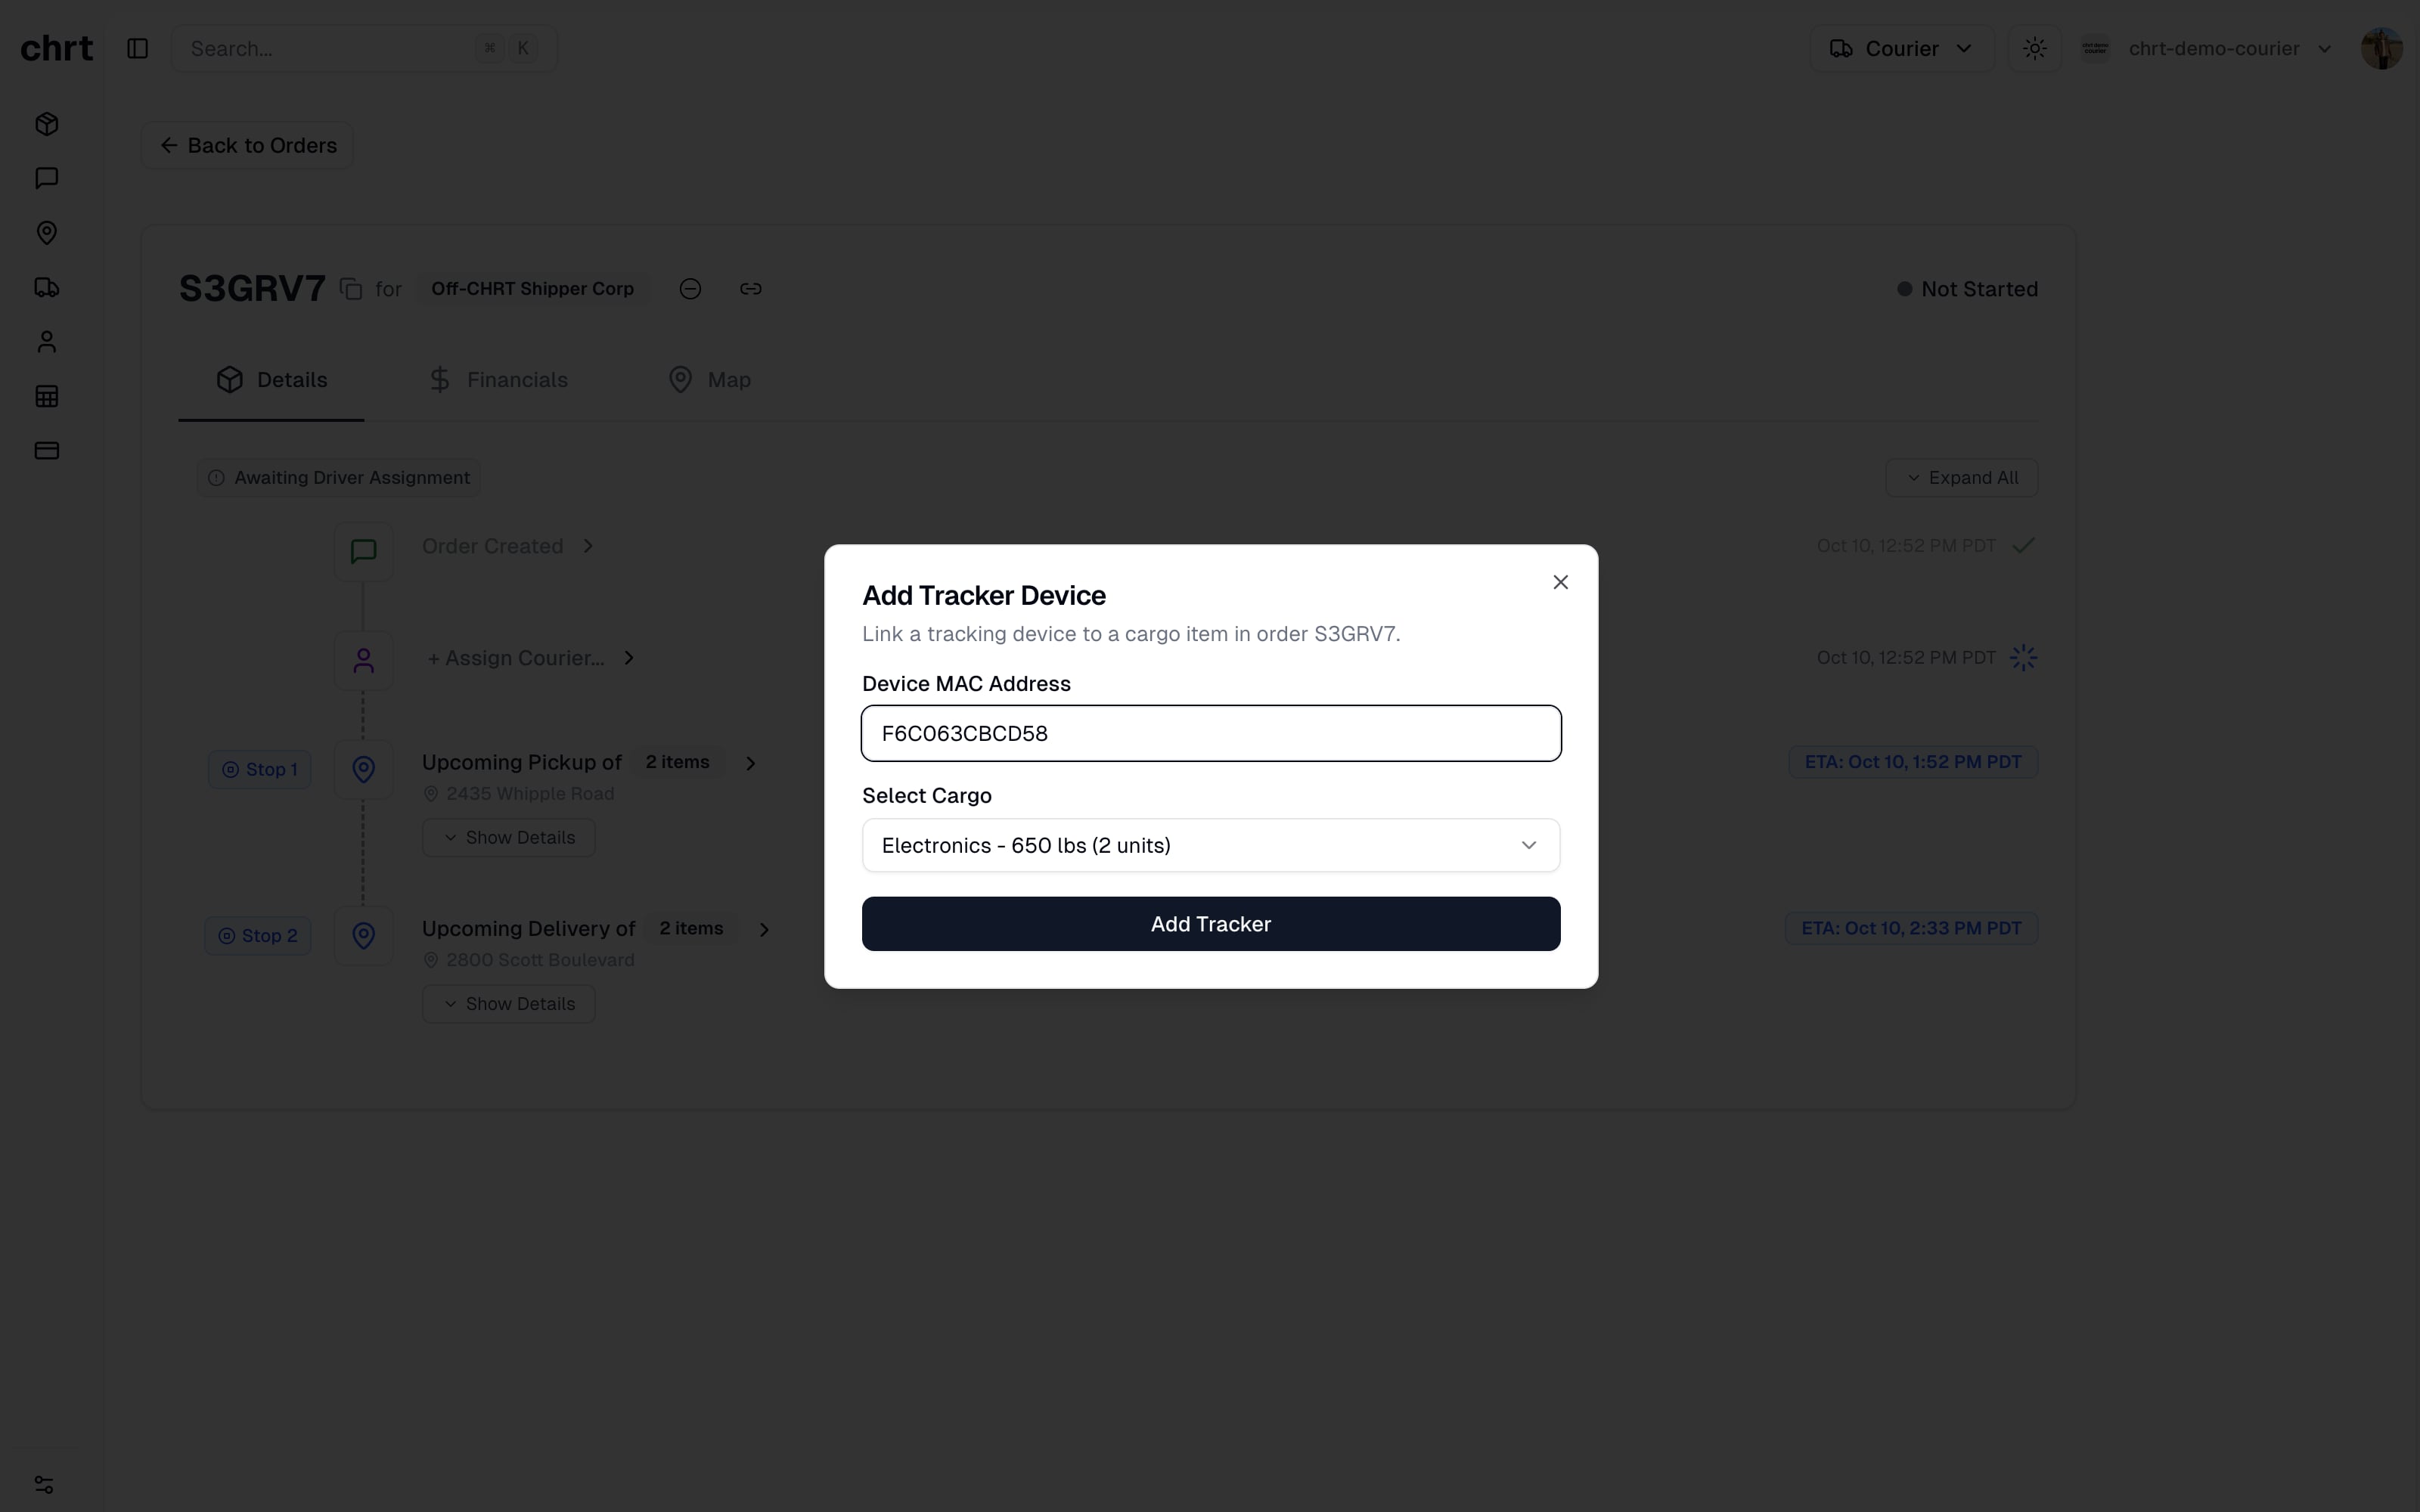
Once the tracker is linked, you will see it in the details for the cargo item.
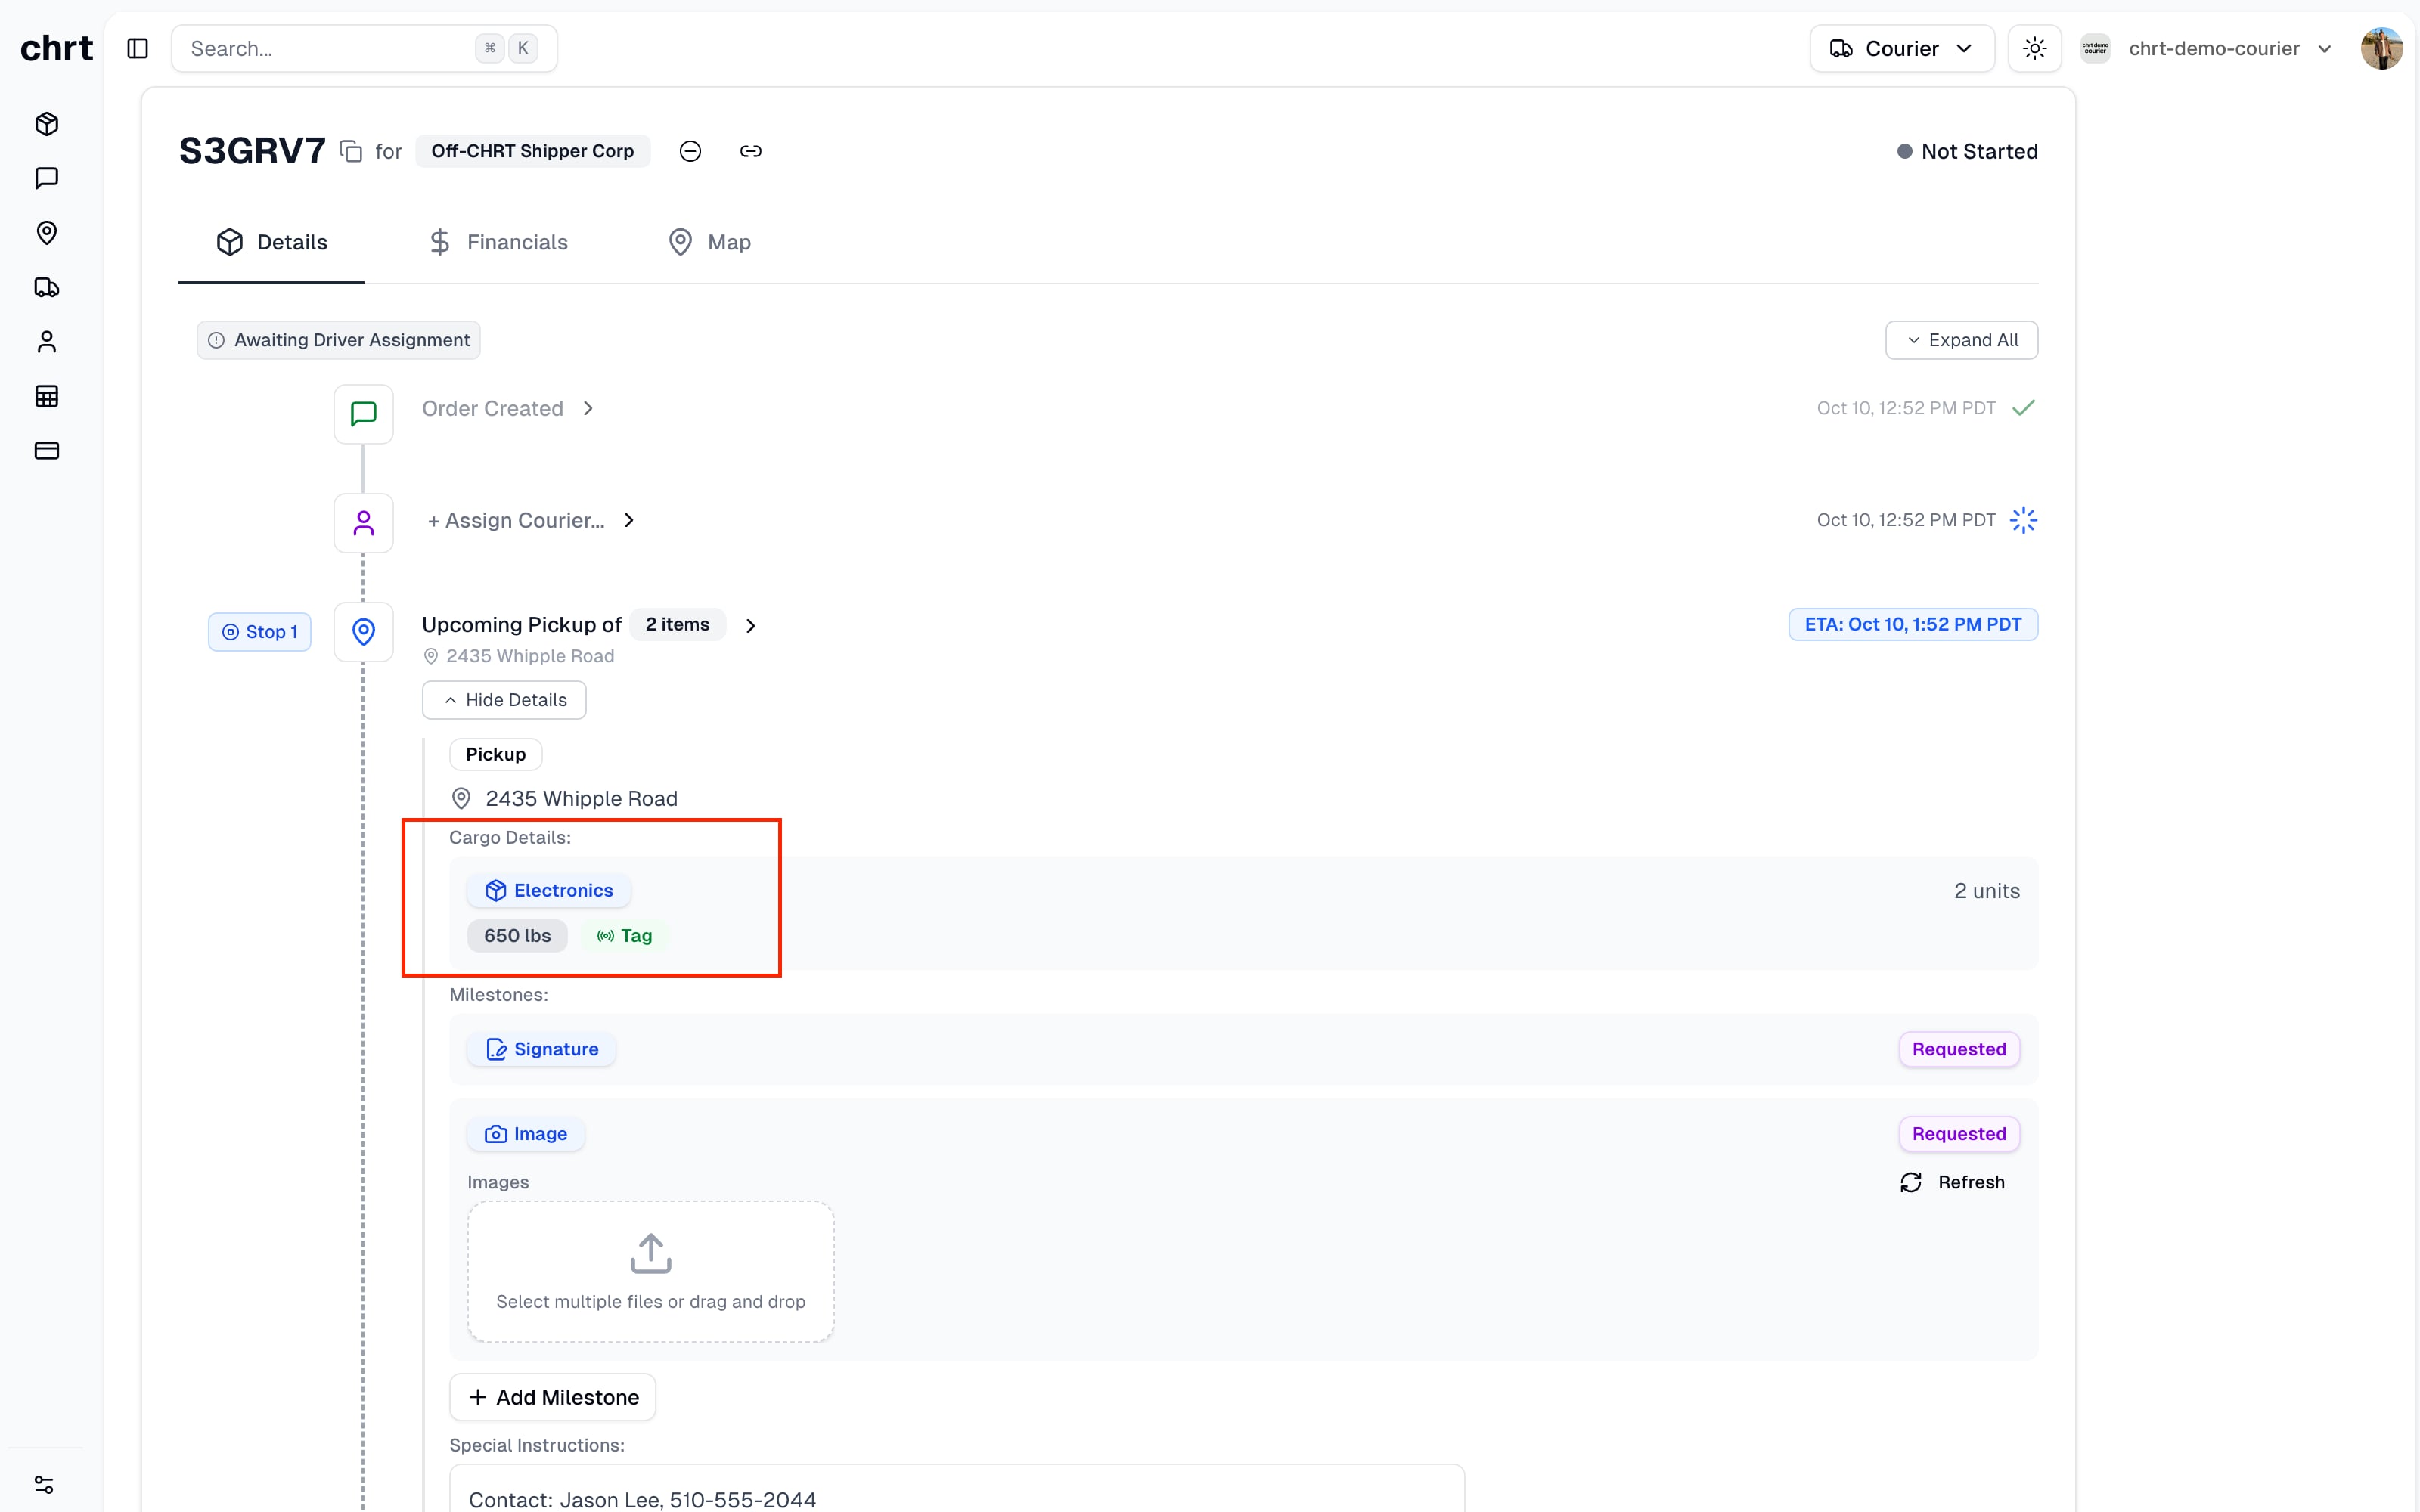
If you click the “Map” tab, you will see the tracker’s location on the map (as well as the driver’s location if the driver has been assigned).
2. Use a Tracker Standalone
You can use a tracker standalone (on your own shipments without placing an order with chrt) by creating a “Session” for the tracker.
First, you need to register the device with the organization you use to log into chrt. You can do this on the devices dashboard.
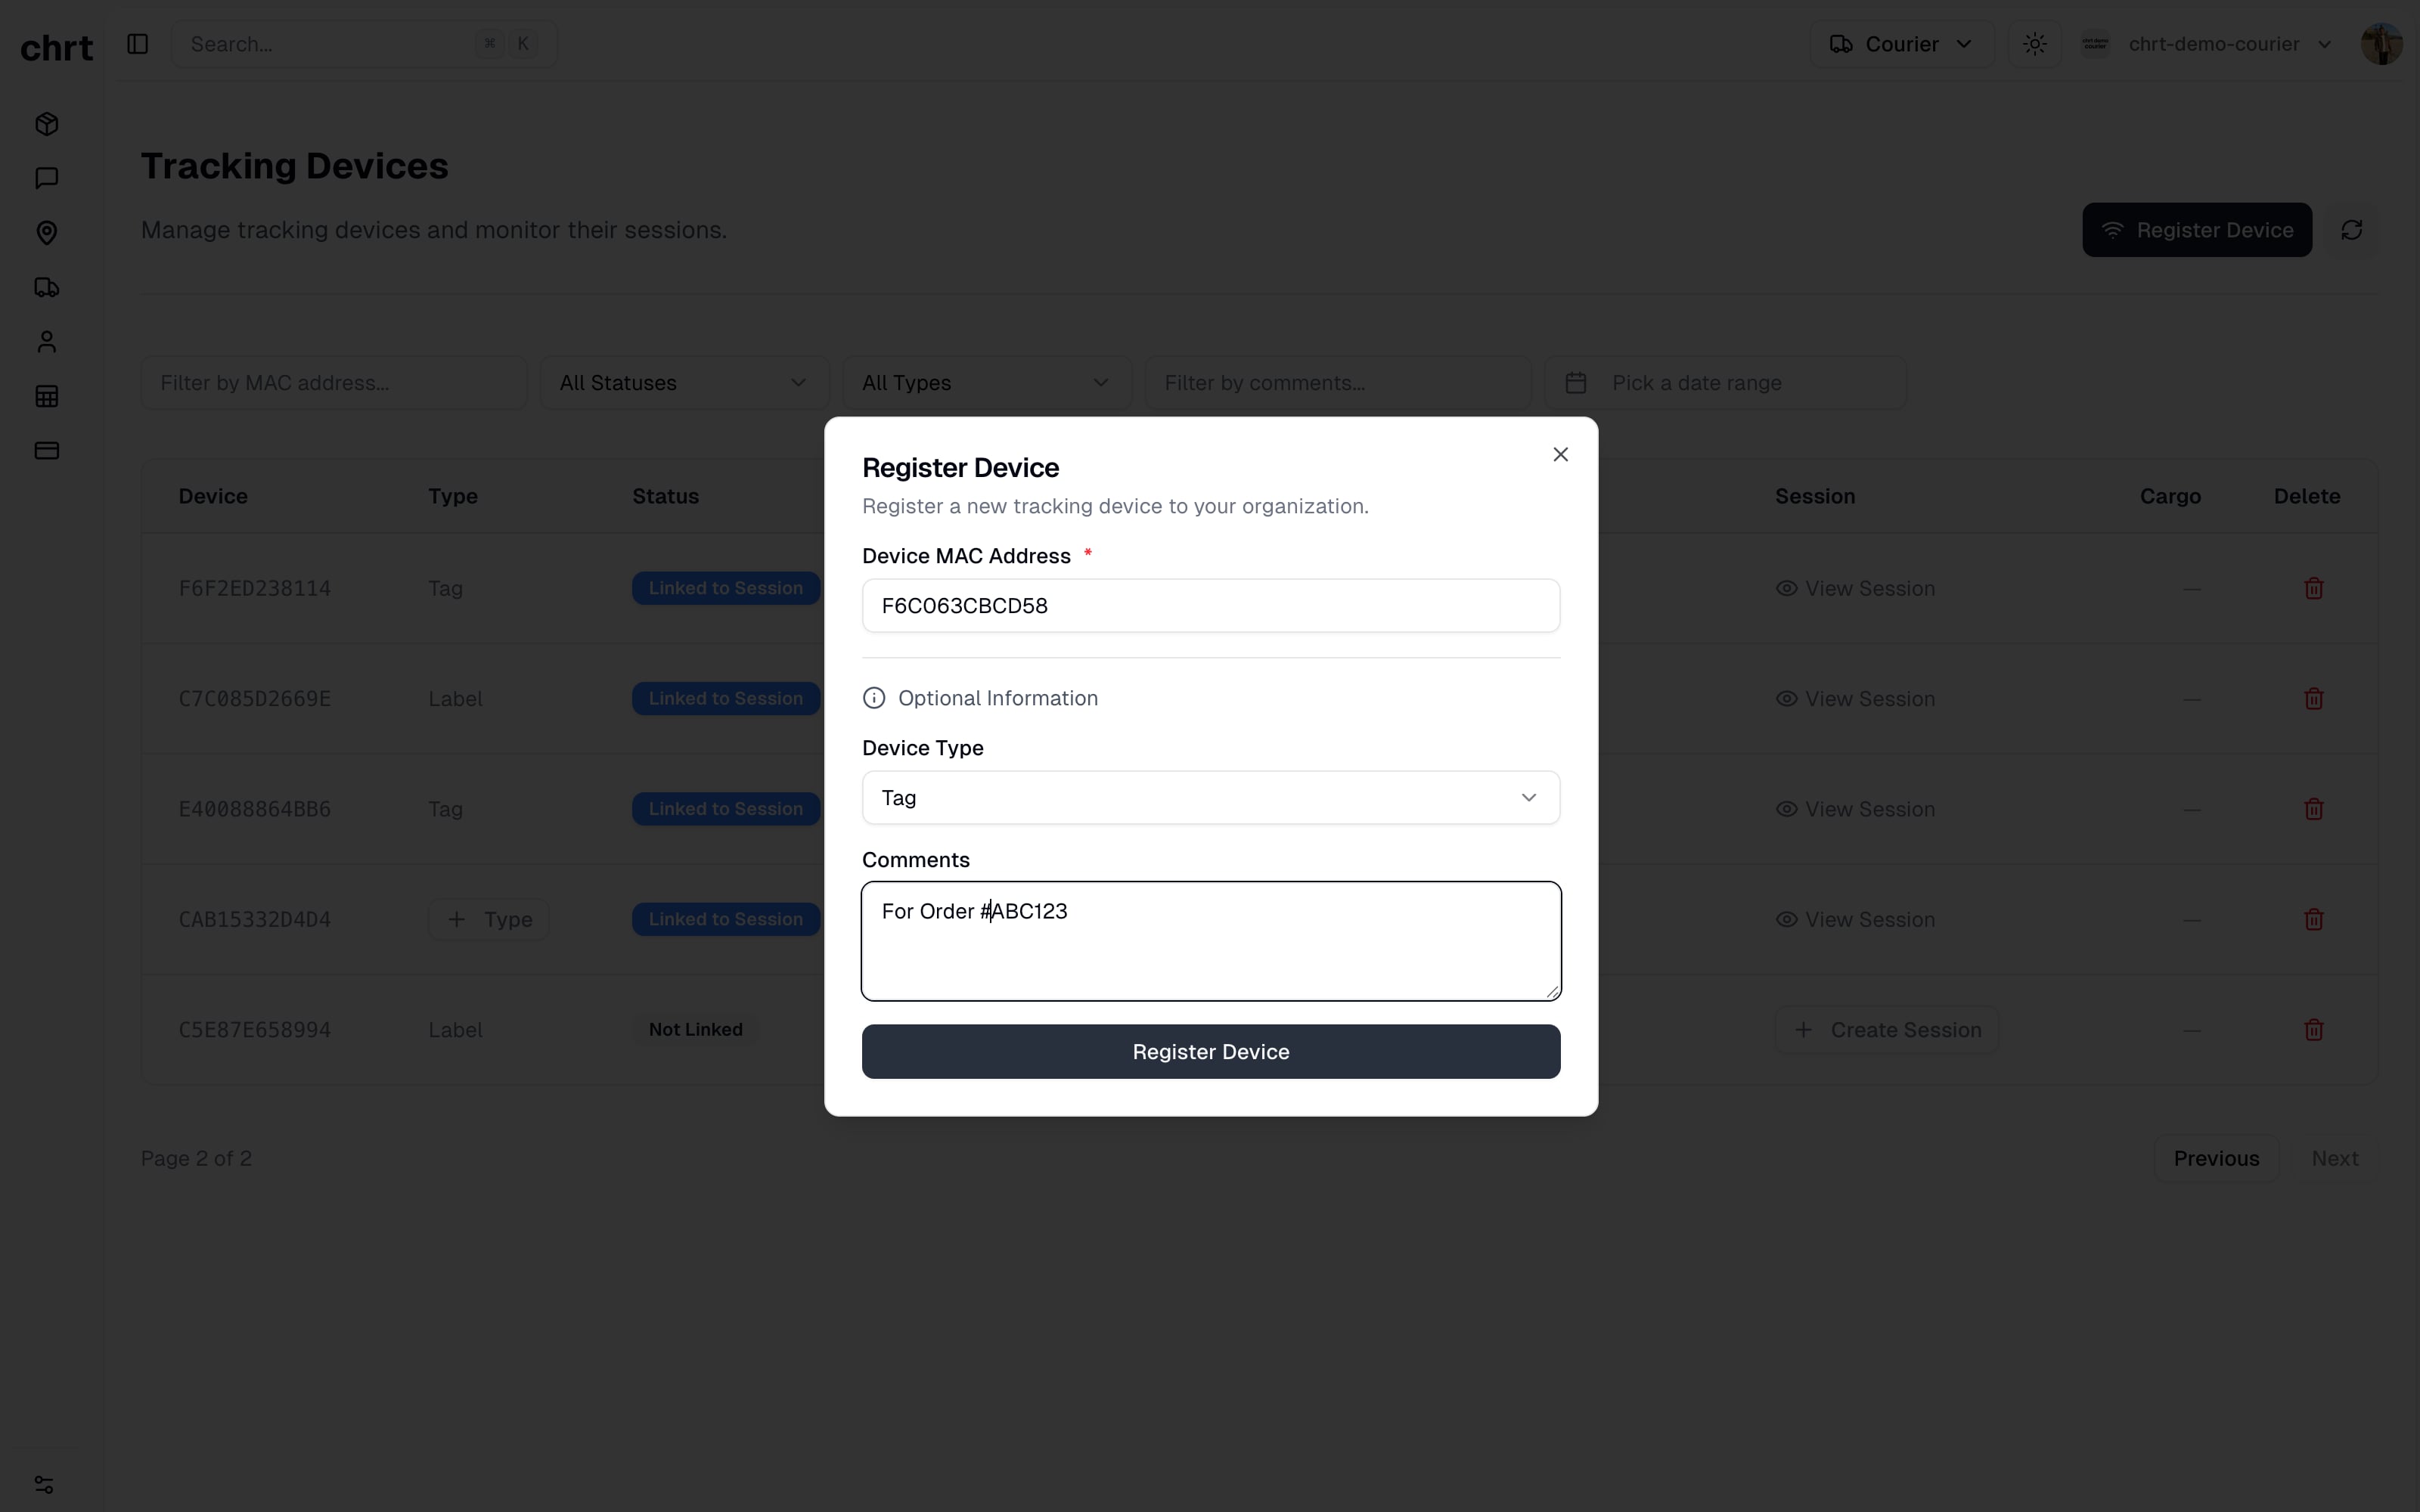
Next, you will need to create a “Session” for the tracker. A session allows you to track the device and record data from it for as long as you need. More details about sessions are below.
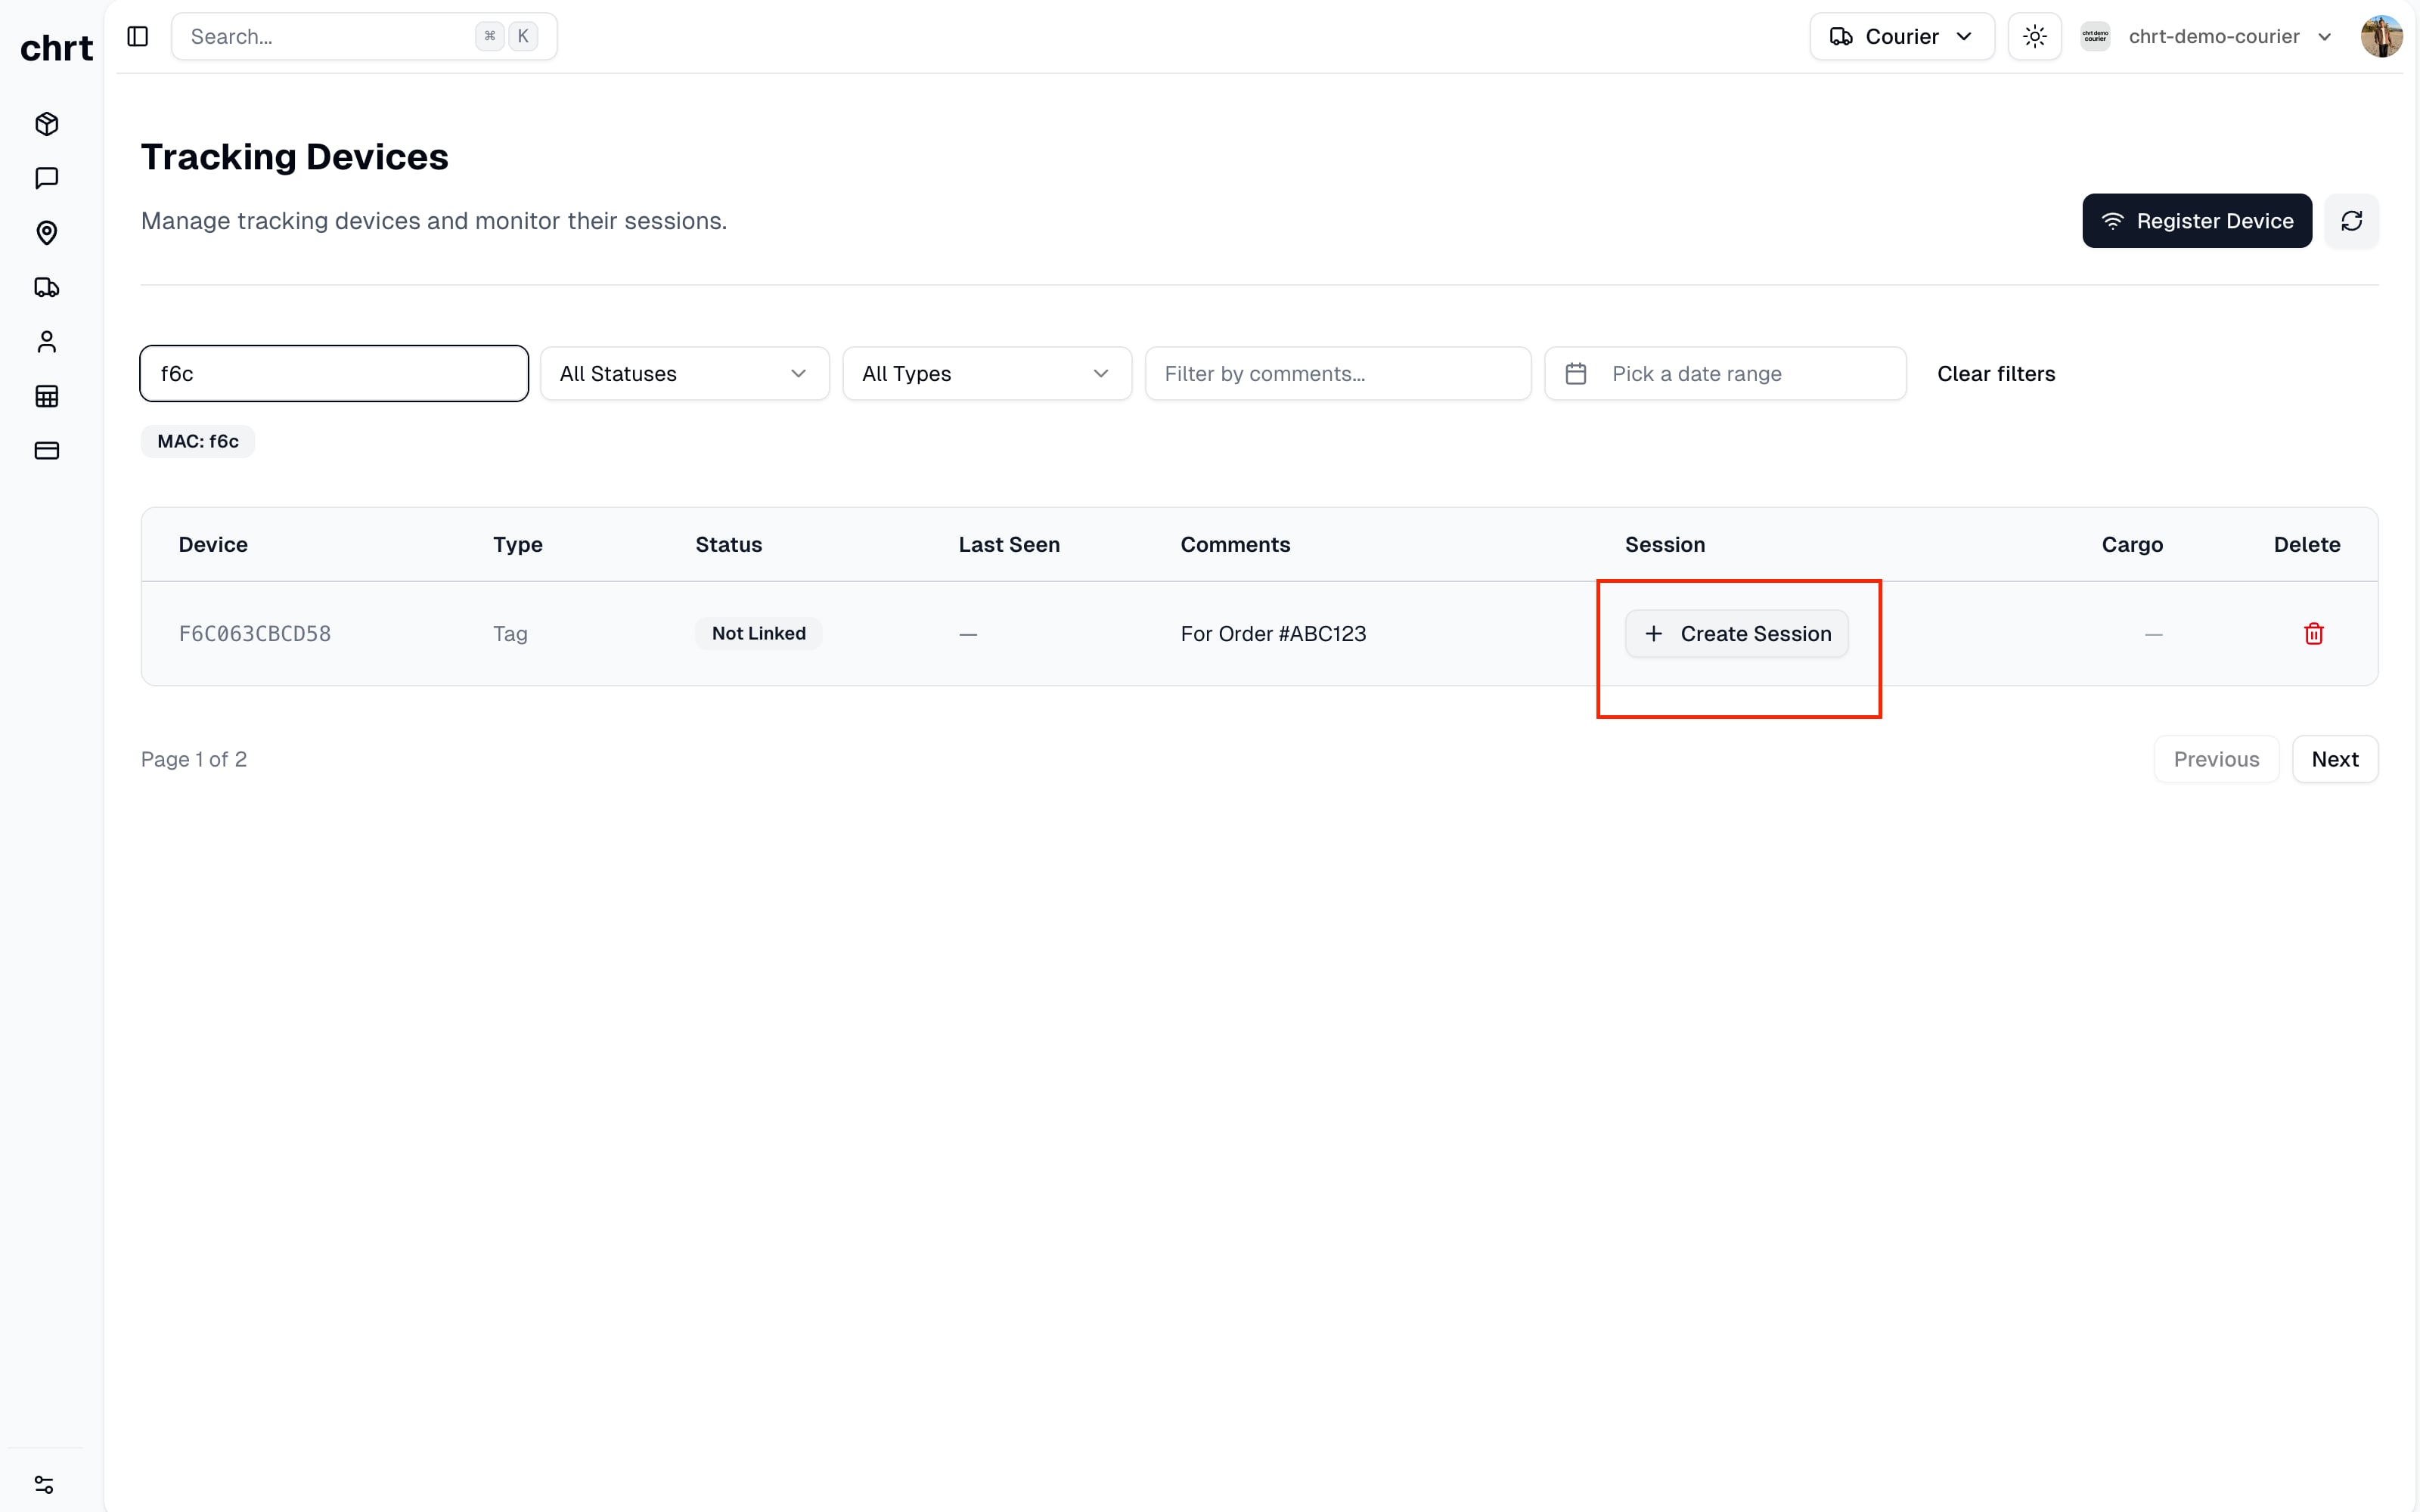
Once a session is created, the next step is to start the session. You can do this by clicking the “Start Session” button on the session’s details page. This will start recording data from the device and you will see the session’s status change to “REC” in the top right corner.
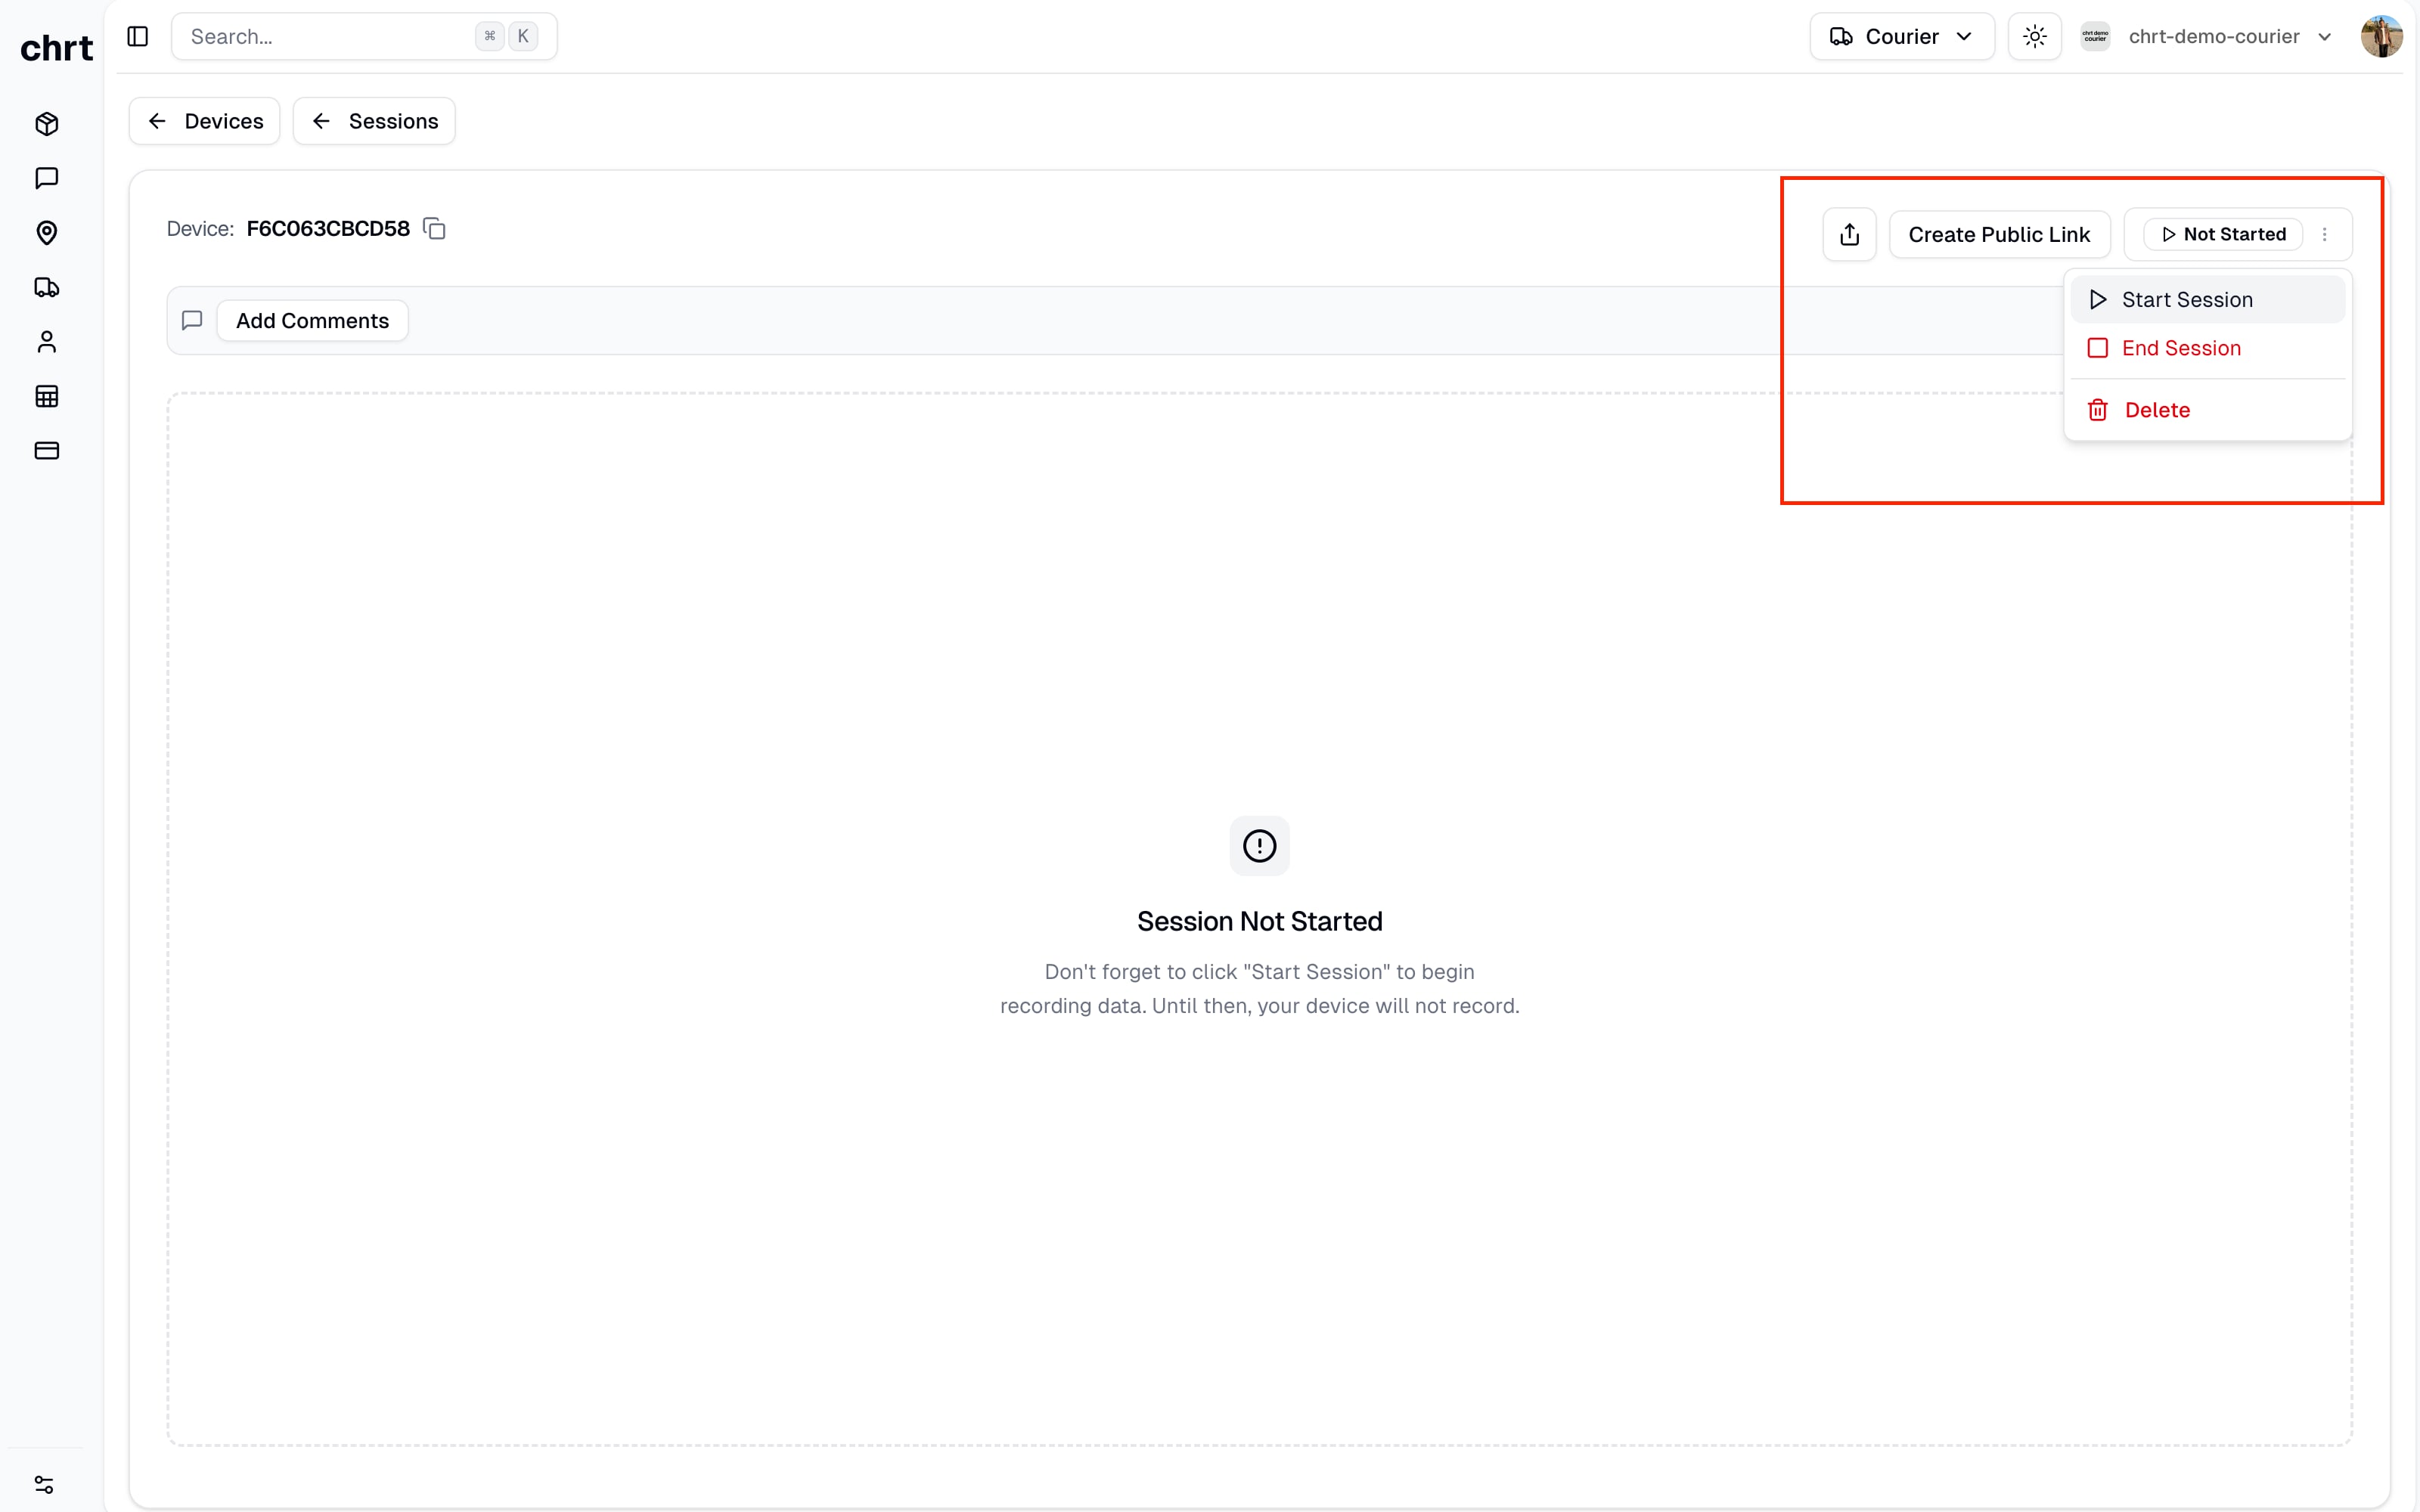
You can pause the session by clicking the “Pause Session” button. This will stop recording data from the device and you will see the session’s status change to “PAUSED” in the top right corner. Similarly, you can “End” the session once you are permanently done recording data for this session. Ending a session will stop recording. You can create a new session for the same device to begin recording again.
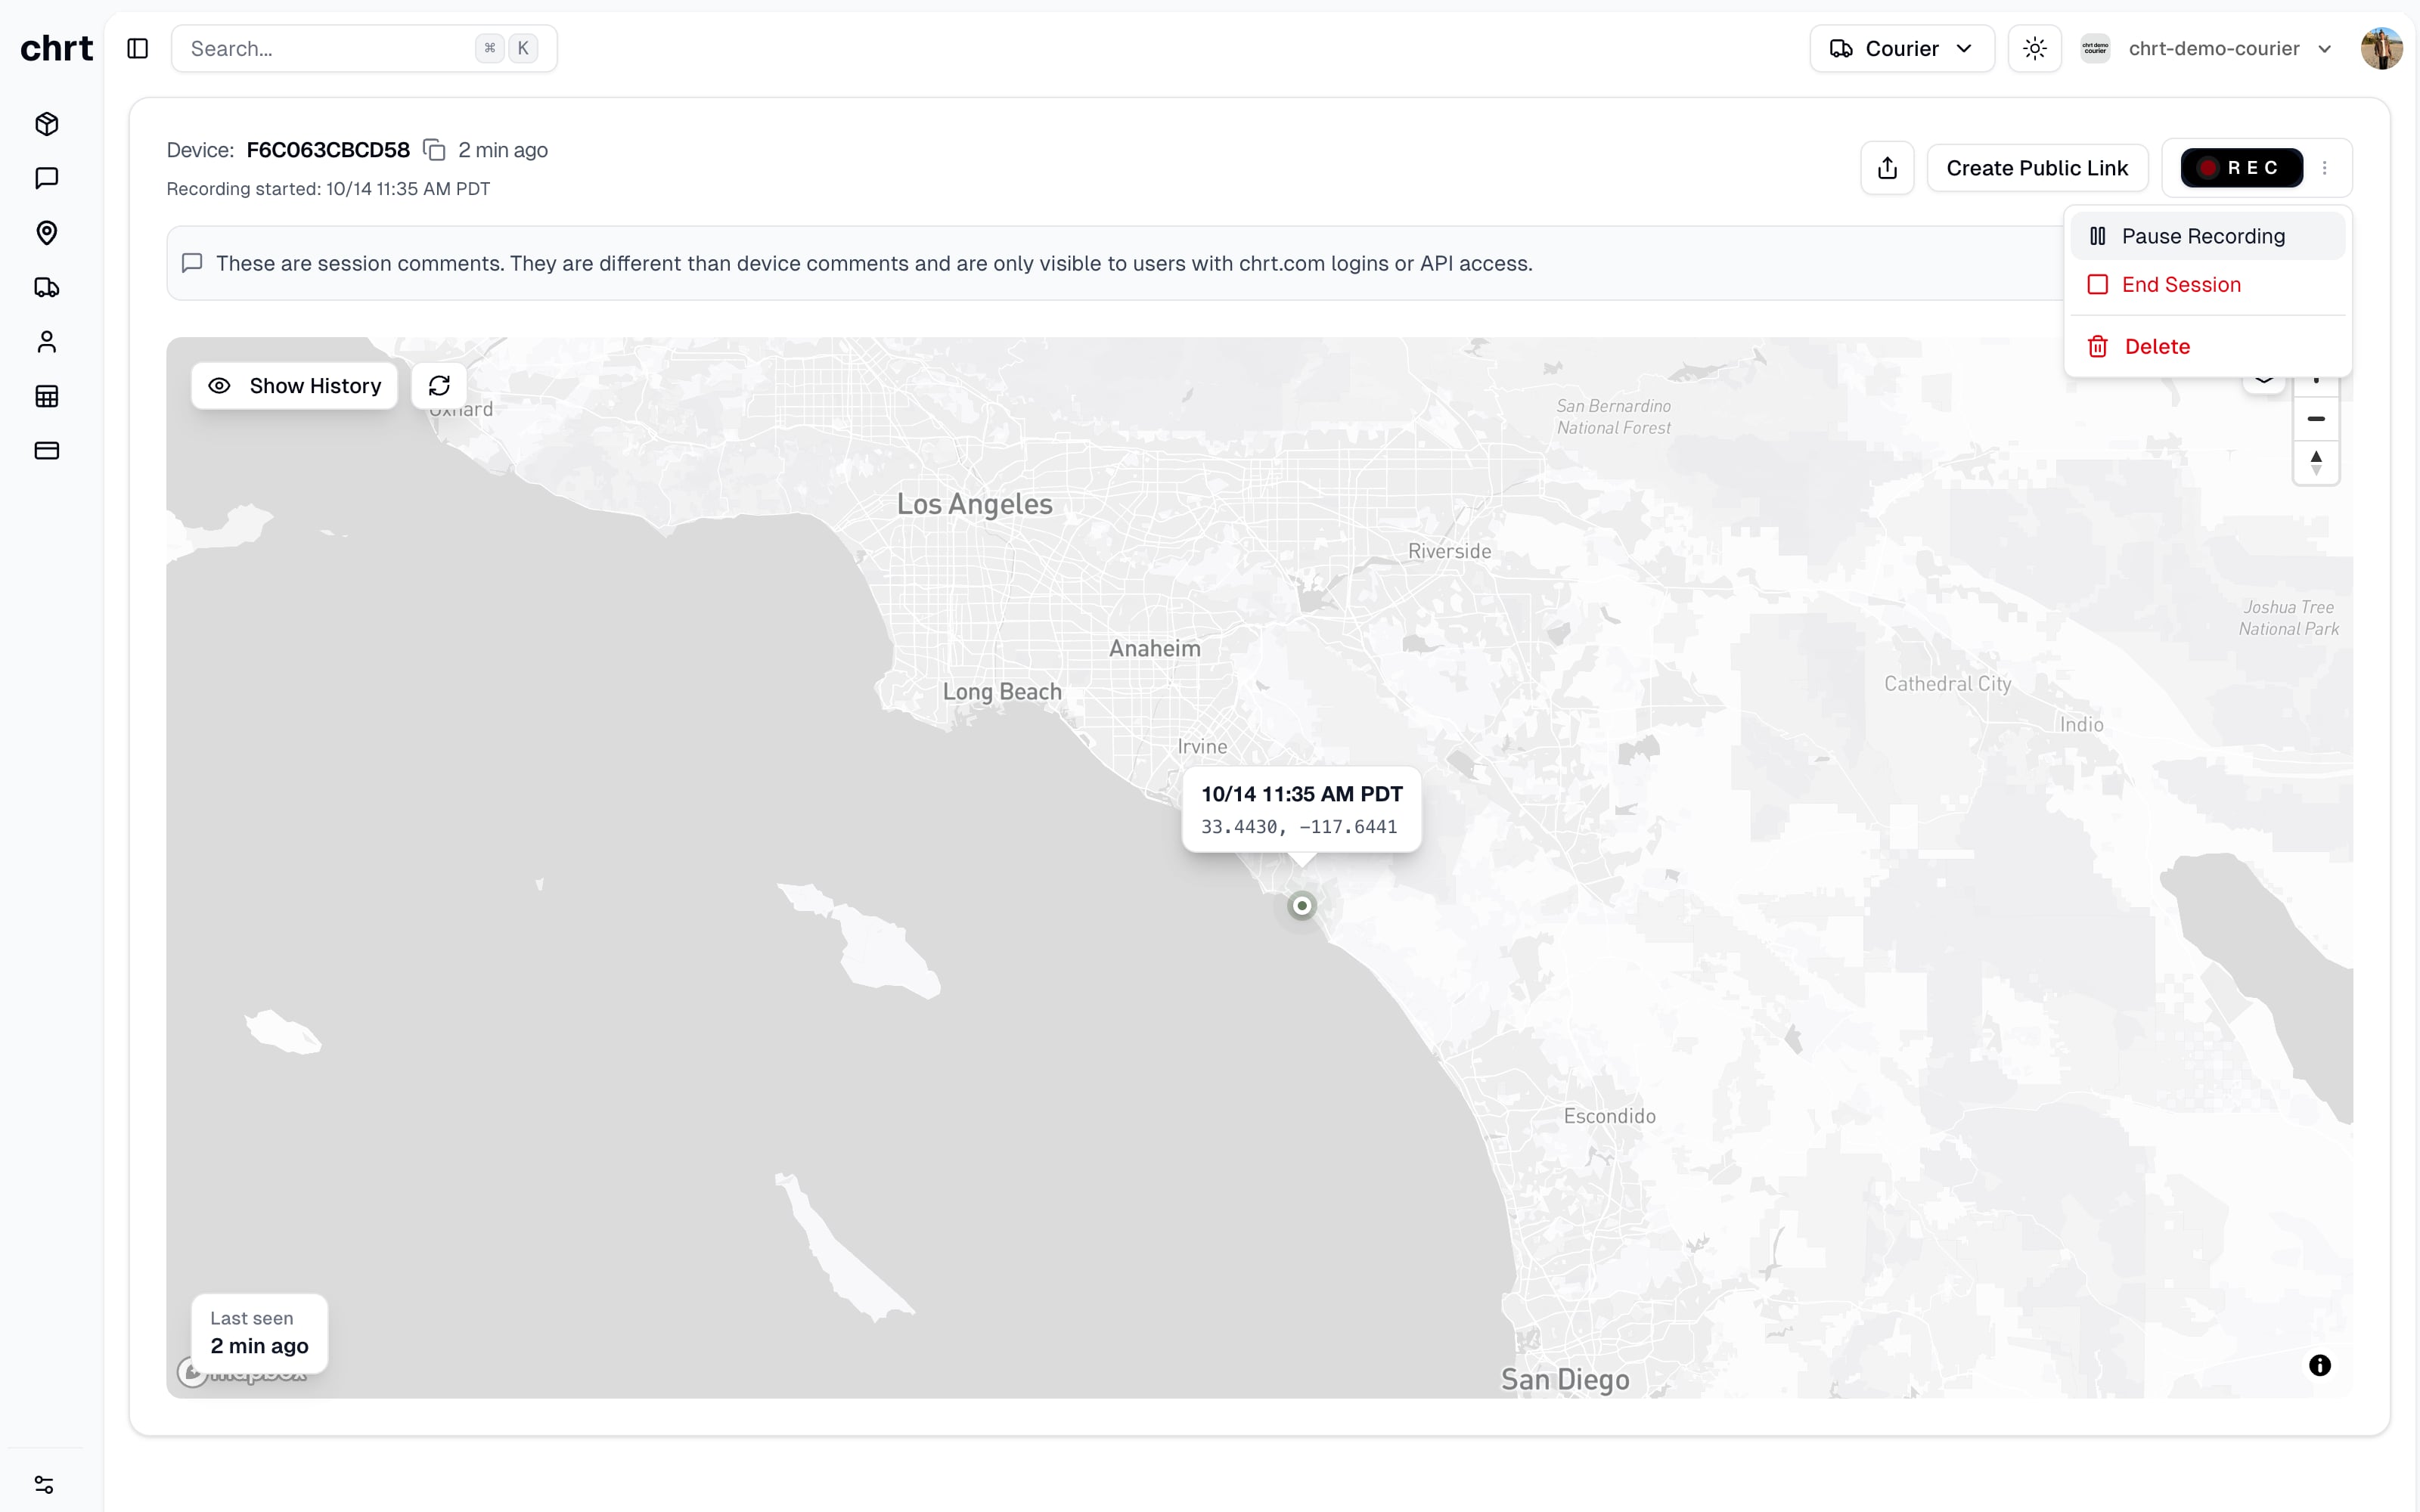
We also make it seamless to share the tracking link with your customers. To do so, you need to make a “Session” public. Details for public sessions are below. To make a session public, you simply need to click the “Create Public Link” button on the session’s details page.
Additional Details on Tracking Sessions
A tracking session is a way to track a device and record data from it for as long as you need.
Sessions allow you to do all of the following:
- View the device’s location and metadata in real-time
- View the device’s shipment history (all of the pings that the device has sent)
- Create a public link to share tracking with your customers
- Pause and resume recording data from the device for any reason and for any length of time
- Terminate the session to prevent further data from being recorded
- Delete the session to remove all recorded data permanently
Creating a Session through our UI or API
Using chrt.com
You can create a session for a device by clicking the “Create Session” button on the devices dashboard or the sessions dashboard.
Using the API
You can create a session for a device by using the create session API.
Making a Session Public through our UI or API
Using chrt.com
- You can make a session public from the sessions dashboard or from the session’s details page.
- There is a button to view the public session page and to copy the public link.
Using the API
You can make a session public by using the update session API
⚠️ Warning
Once you make a session public, you cannot make it private again. Your only option is to delete the session entirely.
Deleting a Session through our UI or API
Using chrt.com
- You can delete a session from the sessions dashboard or from the session’s details page.
Using the API
You can delete a session by using the delete session API
