

Getting Started as a Shipper
1. Select your organization
Sign in to CHRT or use Sign up. Create or select the organization you will work in. Choose Shipper for a team placing shipments with logistics providers. The setup screen says This selection is permanent for your organization, so check the type before you continue. Confirm the active organization before entering records or inviting teammates.
2. Set up your team
Use Add an Organization Member to invite teammates with the access they need. Confirm the member’s saved role and active organization.
3. Connect the organizations you work with
Open Orgs. The page lists the coordinators you are connected to. Click New coordinator to connect the provider coordinating your shipment. Search by handle, choose Connect, and reopen the saved relationship.
On Orgs 1, New coordinator 2 connects a provider; a saved relationship row 3 appears once it is connected.
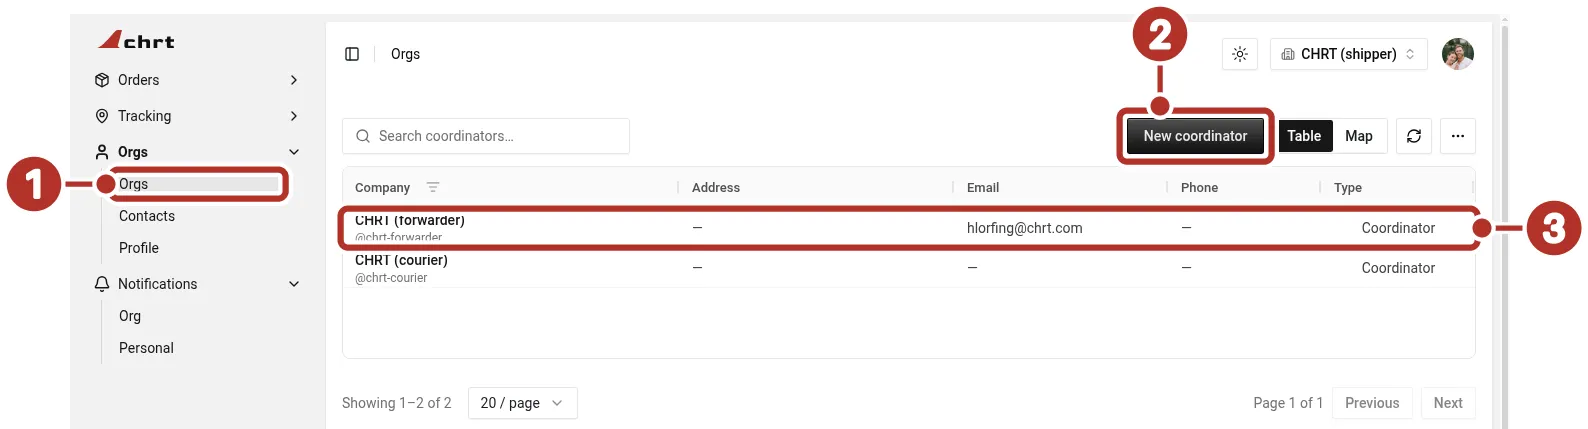
Orgs > Orgs in shipper mode, with two saved coordinator relationships. 1 Orgs > Orgs in the sidebar, 2 New coordinator, 3 a saved relationship row (CHRT (forwarder), @chrt-forwarder) to reopen after connecting.
4. Create the shipment and choose your coordinator
Open Orders and click Create Order. CHRT creates a draft and opens it on Timeline. Build the route in Timeline and enter the items in Cargo, choose your coordinator with Select coordinator… in the order header, then click Stage order. Creating and editing a draft needs an operator role or higher, and you can edit only drafts your organization created.
If staging fails, CHRT lists the requirements that are not met; fix them and stage again. Once the order is staged, your coordinator takes it from there. See Creating Shipments for the full path.
5. Review the saved shipment
Open the order from Orders and review the Summary, Timeline, Cargo, and Messages available to your shipper organization. Check its status, route, cargo, and the coordinator information shown. Review the relevant stop details and reported proof where available; a displayed route or status is not proof that every shipment event has occurred.
Ask your coordinator to correct missing information or confirm assignment and progress. Keep provider task management, bookings, and driver assignment with the team that has those controls. See Creating Shipments for creating a shipment and reviewing it.
6. Set up notifications
Use Organization Notifications for group routing and Personal Notifications for your own preferences. Select the events and channels your team needs, then confirm actual delivery with an approved internal test recipient.
Set up shipper info
Open Edit profile to enter your Handle, Company Name, Business Email, Business Phone, Industry and Street Address. These details are visible to partners on the platform. Upload your logo under Organization Files.