

Tracking Shipments
Open the order workspace
Open Orders and select the shipment. Confirm the order reference and customer before acting. Use Summary 1 for the overview, Timeline for route and event detail, Cargo for shipped items, and Messages for coordination. Mark 2 is the Completed status and the coordinator, mark 3 is the Route card, mark 4 is the Cargo section, and mark 5 is the Progress | Live switch on the map.
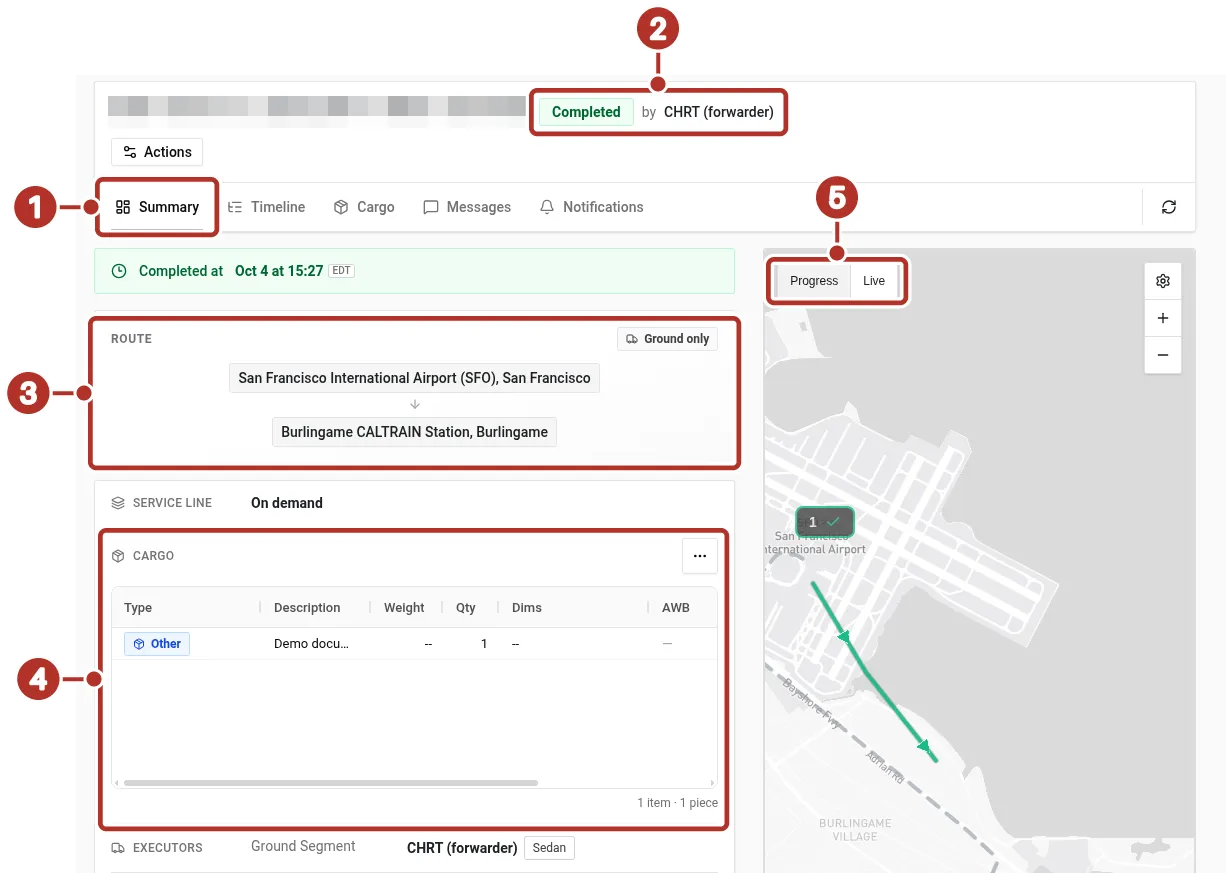
Order Summary tab in the shipper workspace, for a completed order created by the provider. 1 Summary, Timeline, Cargo and Messages tabs, 2 Completed status and the coordinator, shown as by CHRT (forwarder), 3 Route card, 4 Cargo section, 5 Progress / Live toggle on the map.
Read location and route together
The order map can show the route and available tracking sources. Mark 1 is the Map settings gear. Use the map controls to select relevant segments and sources such as Driver 2, Cargo (Driver) 3, and Cargo with Device. Mark 4 is See all pings, and mark 5 is the Progress | Live switch.
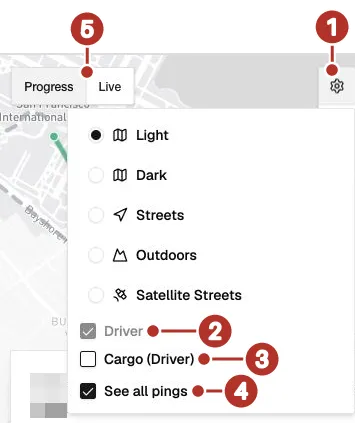
Order map settings in the shipper view. 1 Map settings gear, 2 Driver (on, and dimmed because it is the only source shown), 3 Cargo (Driver) (off), 4 See all pings (on), 5 Progress | Live switch. Look at 2 and 3 to see which sources the map is showing.
Check the last update and selected source before treating a marker as the shipment’s current location. Missing data can reflect source, connectivity, access, or configuration. On the Summary tab, the map has a Progress | Live switch 1. Selecting a point opens a popover 2 with its time and driver.
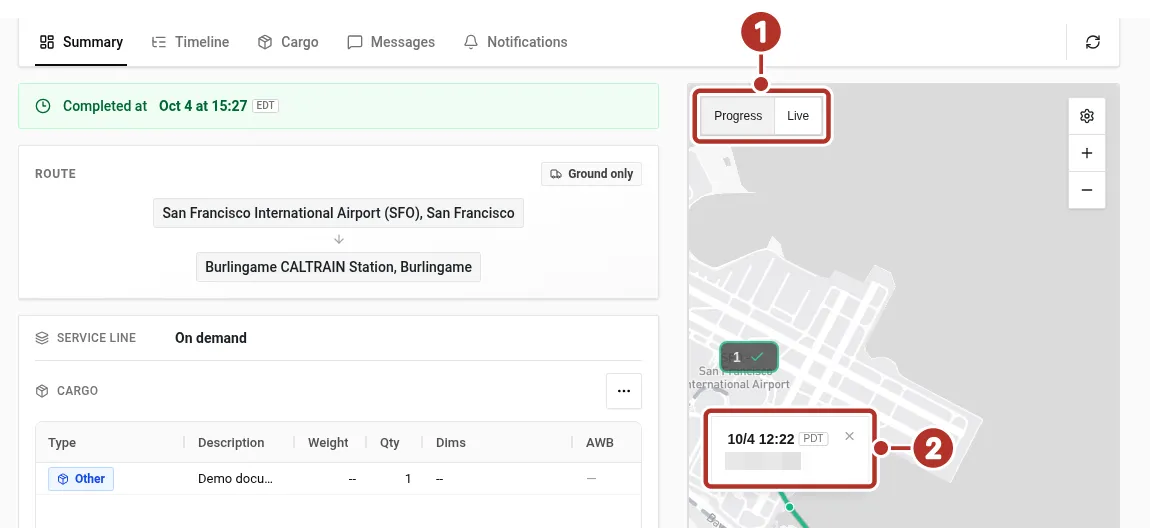
Order Summary tab of a completed order in the shipper view: the ground route in Progress, with one map point selected (10/4 12:22 PDT). 1 Progress | Live switch, 2 popover of the selected map point (time and driver).
Inspect timeline detail and proof
The read-only timeline lists the Driver Assigned 1 node and the Pickup 2 and Deliver 3 stops. Select the relevant timeline event or stop to open its detail panel. Read the recorded status and timestamps, then inspect the task artifacts associated with that task. Flight segments include flight detail and milestones. An attached document does not by itself establish that a flight booking or airline handoff succeeded.
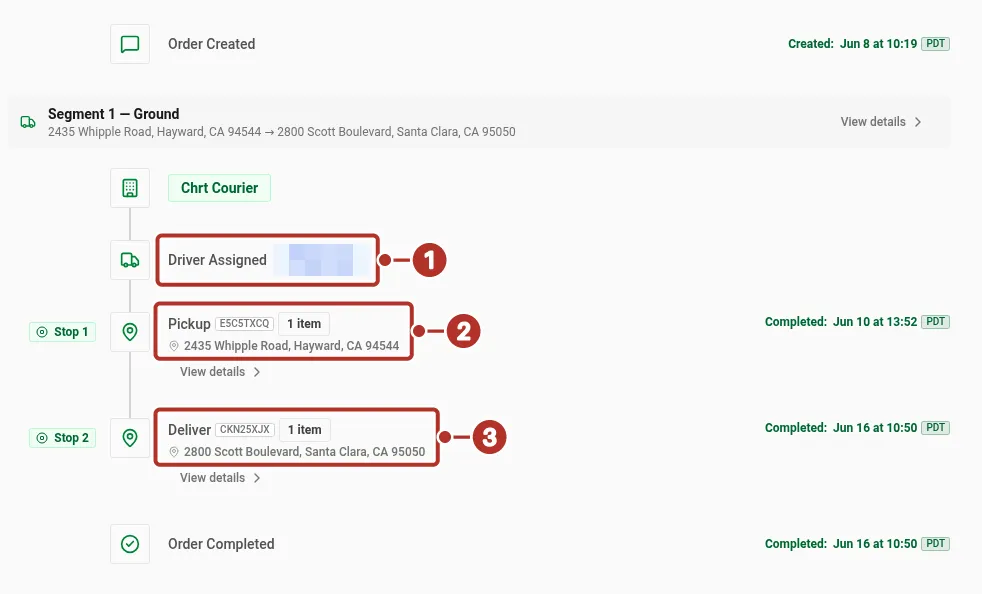
Order Timeline tab of a completed order in the shipper workspace. 1 Driver Assigned node, 2 Pickup node, 3 Deliver node.
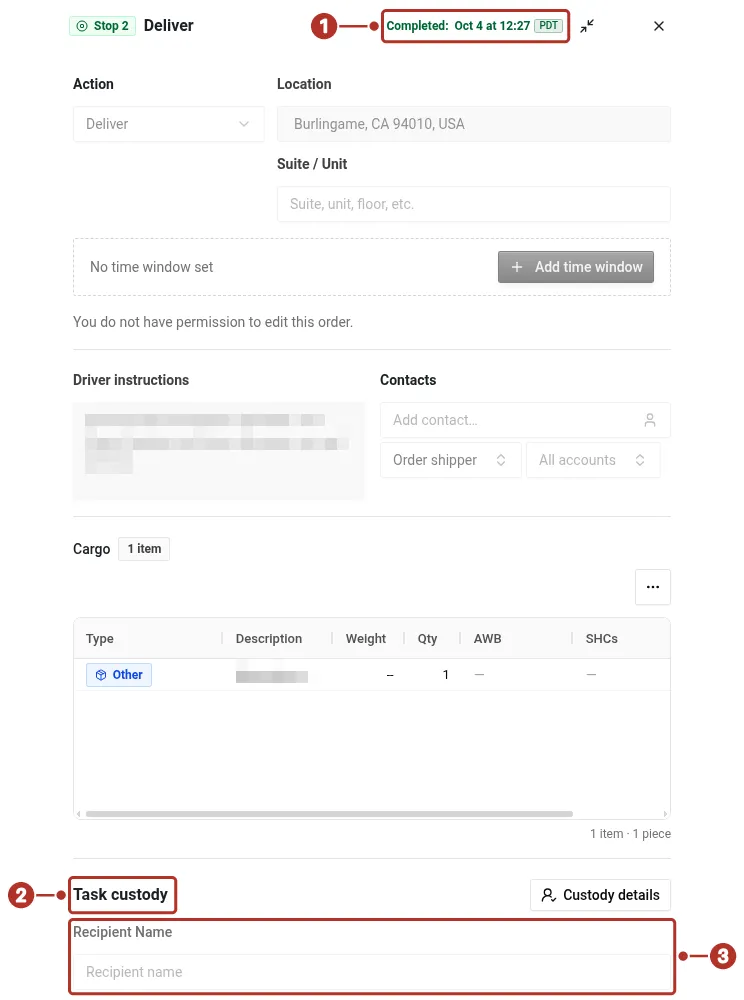
Delivery detail panel for Stop 2, Deliver, in the shipper Timeline. 1 Completed time (12:27 PDT), 2 Task custody section, 3 Recipient Name field (blank, disabled).
The delivery task records completion at 12:27 PDT 1. In the Task custody 2 section, it has a blank, disabled Recipient Name 3 field. An artifact’s recipient is a separate field.
Scrolled to Attachments, an Image 1 artifact records its own completion time and proof file 2. Compare artifact and task times separately; an artifact does not fill the task’s blank recipient field.
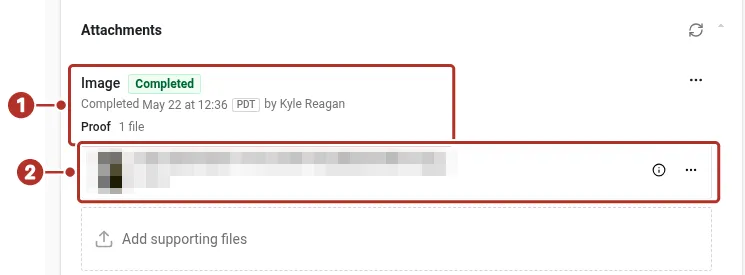
Stop Deliver detail in Timeline for the shipper, scrolled to Attachments. 1 Image artifact, 2 saved proof file.
Understand the shipper view
A shipper view can display Agent assigned or Agent instead of a third-party executor or driver’s identity. Work with your coordinator when you need dispatch information. The display varies by the organization’s relationship to the segment; do not expect every viewer to see the same names or contact details.
Use order actions
Open the actions available in your current organization and order state. In the sample CHRT shipper profile, the completed fictional order offers Share tracking 1. Other roles or states may expose different actions; confirm the actual menu before relying on an option.
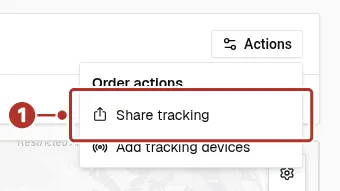
Order header with the Actions menu open. 1 Share tracking.
For public sharing, follow Public Tracking Links and inspect the recipient’s view.
Confirm progress
Reload the order and compare the saved task statuses, timestamps, and proof with the work actually completed. A route line is planned travel; a location update is observed tracking; a completed task is a recorded operational event. Check each separately when an ETA or status appears inconsistent.
For billing workflows and rate configuration, see Billing.