

Accepting Orders
Use the Offers view in the Orders tab to review work before you commit. An offer response, an assignment and starting an order are separate steps.
Before you start
Confirm the active organization in Settings, your driver profile and your ability to carry out the work. Ask dispatch to confirm the expected assignment. Notifications can alert you, but you can also open Orders and choose Offers directly.
Work can reach you directly when your driver classification allows direct assignment. An authorized operator manages the driver classification used for direct W2 assignment. Separately, your organization’s admin controls whether its connection with a coordinating provider lets that provider assign work to your organization without a listing and bid. Driver and operator availability are separate checks. A Dispatch directly listing is an accept-or-deny request in the offer flow; review its rule and your available response controls before replying. Ask dispatch to resolve a missing or incorrect profile setting.
1. Find the work
Open Orders, tap the Filter orders button 1 at the top right and choose Offers. Incoming offers appear under Incoming Offers; work assigned to you appears under Assigned to You 2, one row per order 3 with its reference, vehicle type, status, shipper and stops. Pull to refresh before relying on an old list. If refresh fails, the app may show the last verified offers with a warning. This capture has no incoming offer, so only Assigned to You is shown.
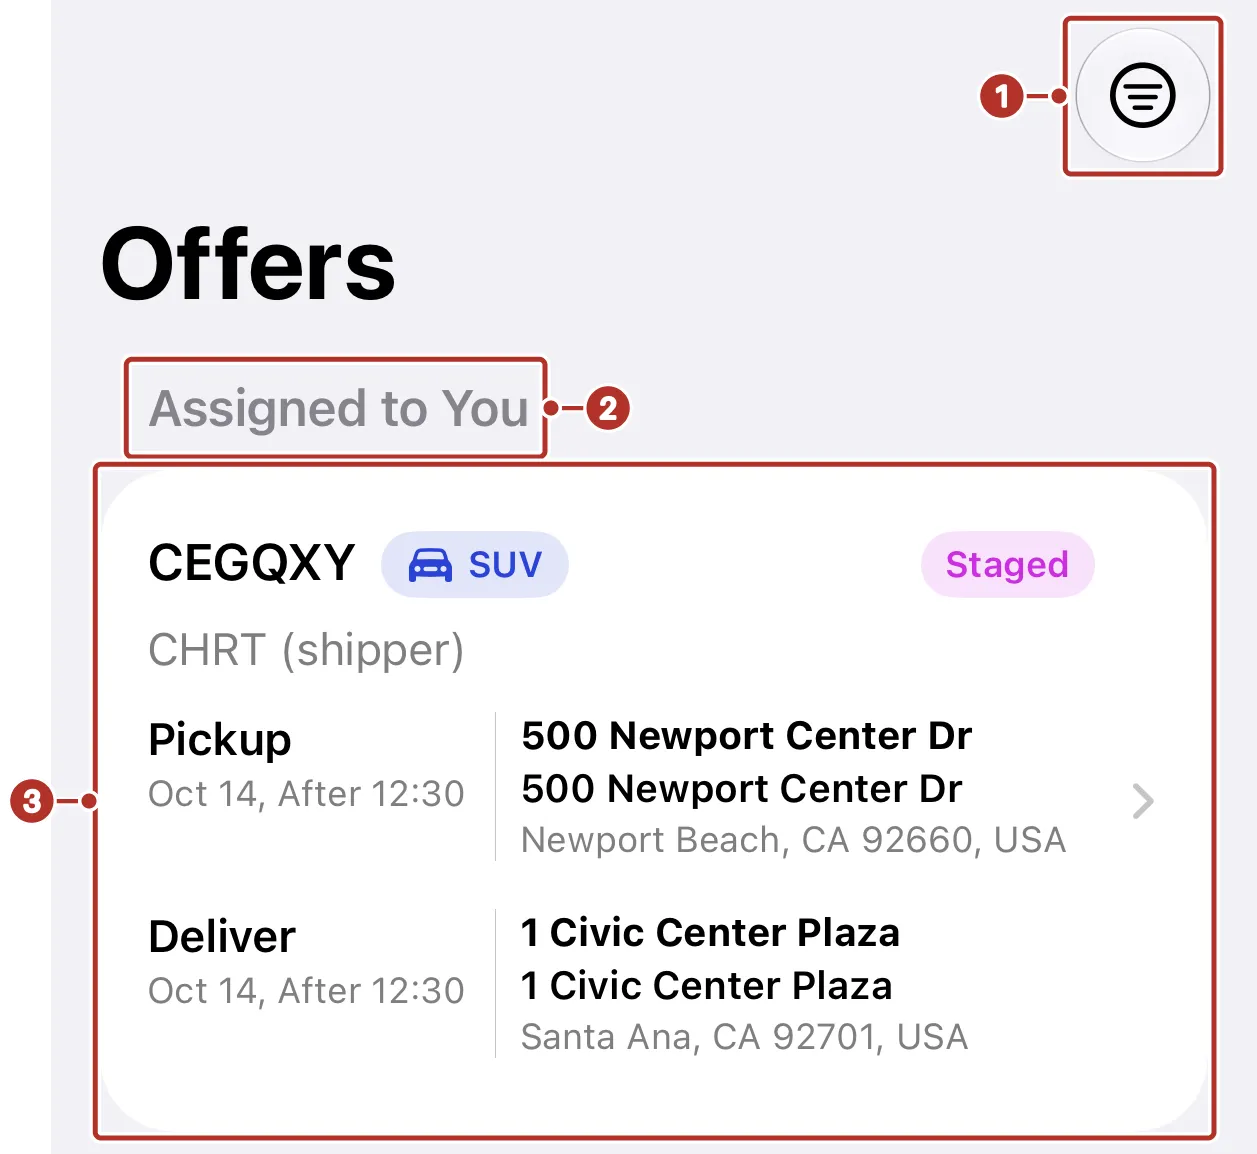
The Offers view on iPhone with one order assigned. 1 Filter orders button, 2 Assigned to You heading, 3 assigned order row.
The Filter orders menu lists Offers 1, In Progress 2, Completed 3 and Cancelled 4; a tick marks the one you are viewing.
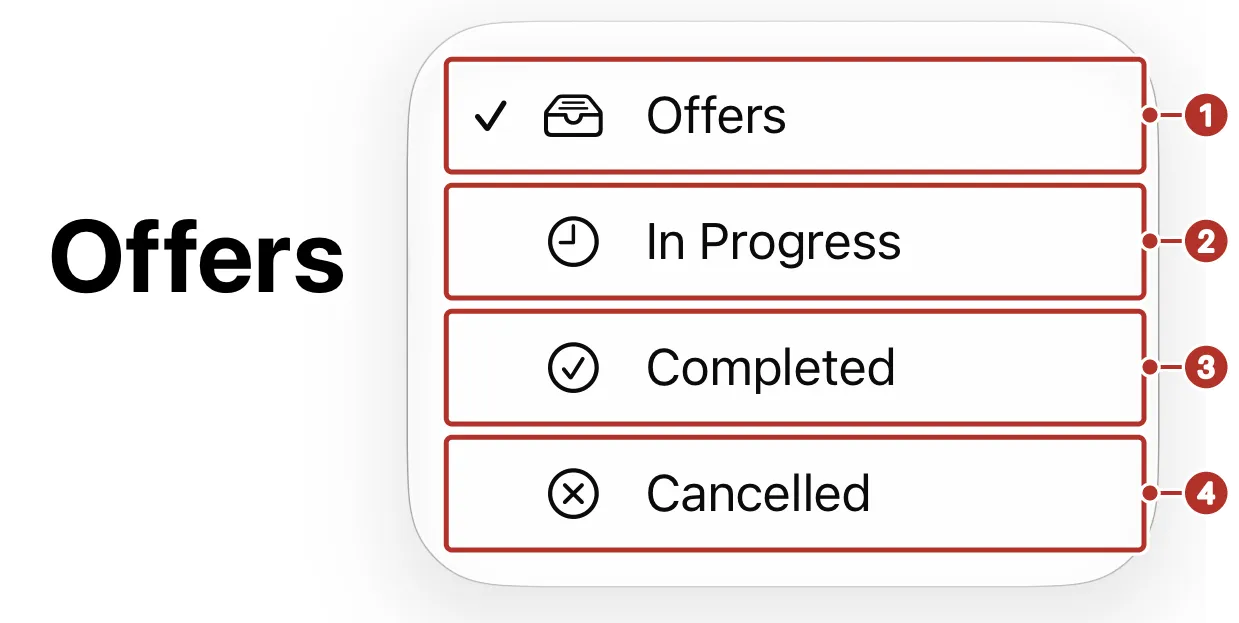
The Filter orders menu. 1 Offers, 2 In Progress, 3 Completed, 4 Cancelled.
2. Review the details
Open the row and review the available stops, instructions, cargo and proof requirements. Read the offer’s assignment rule and displayed response controls. Ask dispatch about missing instructions before accepting.
Where flight details are available, departure uses the origin airport’s local time and arrival uses the destination airport’s. Airline tender or recovery work can show the relevant endpoint; an onboard-courier itinerary can show both. Read each date, timing label and timezone together. See Read flight times.
3. Respond to the offer
Read the assignment rule before opening Respond to Offer. The actions available depend on the offer and your latest response.
- A dispatch request offers Accept Order or Decline. Accept only when you can take the work. With first accept wins, the first successful acceptance assigns the offered segment.
- A negotiated offer can offer Send Bid, Accept Order or Decline. To propose an amount, choose Send Bid, enter Amount in Price, add an optional comment and send. The app submits one price line for the offered work.
- After dispatch sends an offer or counter, Send Counter lets you propose a revised amount. Review the current offer and history before responding. The mobile amount must be greater than zero to send a bid or counter.
- After you send a bid or counter, wait for dispatch’s response. Withdraw Bid is available while that response remains open. After a negotiated acceptance, wait for dispatch to assign the work.
Decline rejects the offer; Withdraw Bid removes your open bid from consideration. Closing an unsent response form does neither. Offer responses require a connection; reconnect and check the saved history if sending fails.
Confirm your assignment
A Response sent or accepted response is not proof that the work has been assigned to you. Negotiated acceptance can still be waiting for dispatch; an automatic assignment can also fail if another recipient accepted first.
On an offer you have won, the offer shows You got this order and says it appears under Assigned to You once dispatch releases it; if the order is still a draft, the screen reads Order accepted. An offer awarded elsewhere shows Another driver took this order and is closed. Refresh and confirm the correct task group opens under your account and appears in Assigned to You. If the offer changes, closes or disappears, contact dispatch. Do not assume you can reclaim a declined or withdrawn response. Assignment applies to the offered segment, so check its stops and instructions before starting.
See Bidding and assignment requests for the dispatcher’s listing and award flow.
4. Start driving
Open your assigned task group and tap Start Order 1 when you are ready to begin. Starting the task group and enabling location sharing are separate controls. Check Live location rather than assuming Start Order determines your privacy settings.
On an order assigned to you, the Stops tab also shows a card 2 above the flight card 3, Live location shared publicly or Location not shared publicly, with a Share live location publicly switch. Changing it asks you to confirm with Share Publicly or Stop Sharing. It applies to this order only and is separate from Share Location with Dispatch.
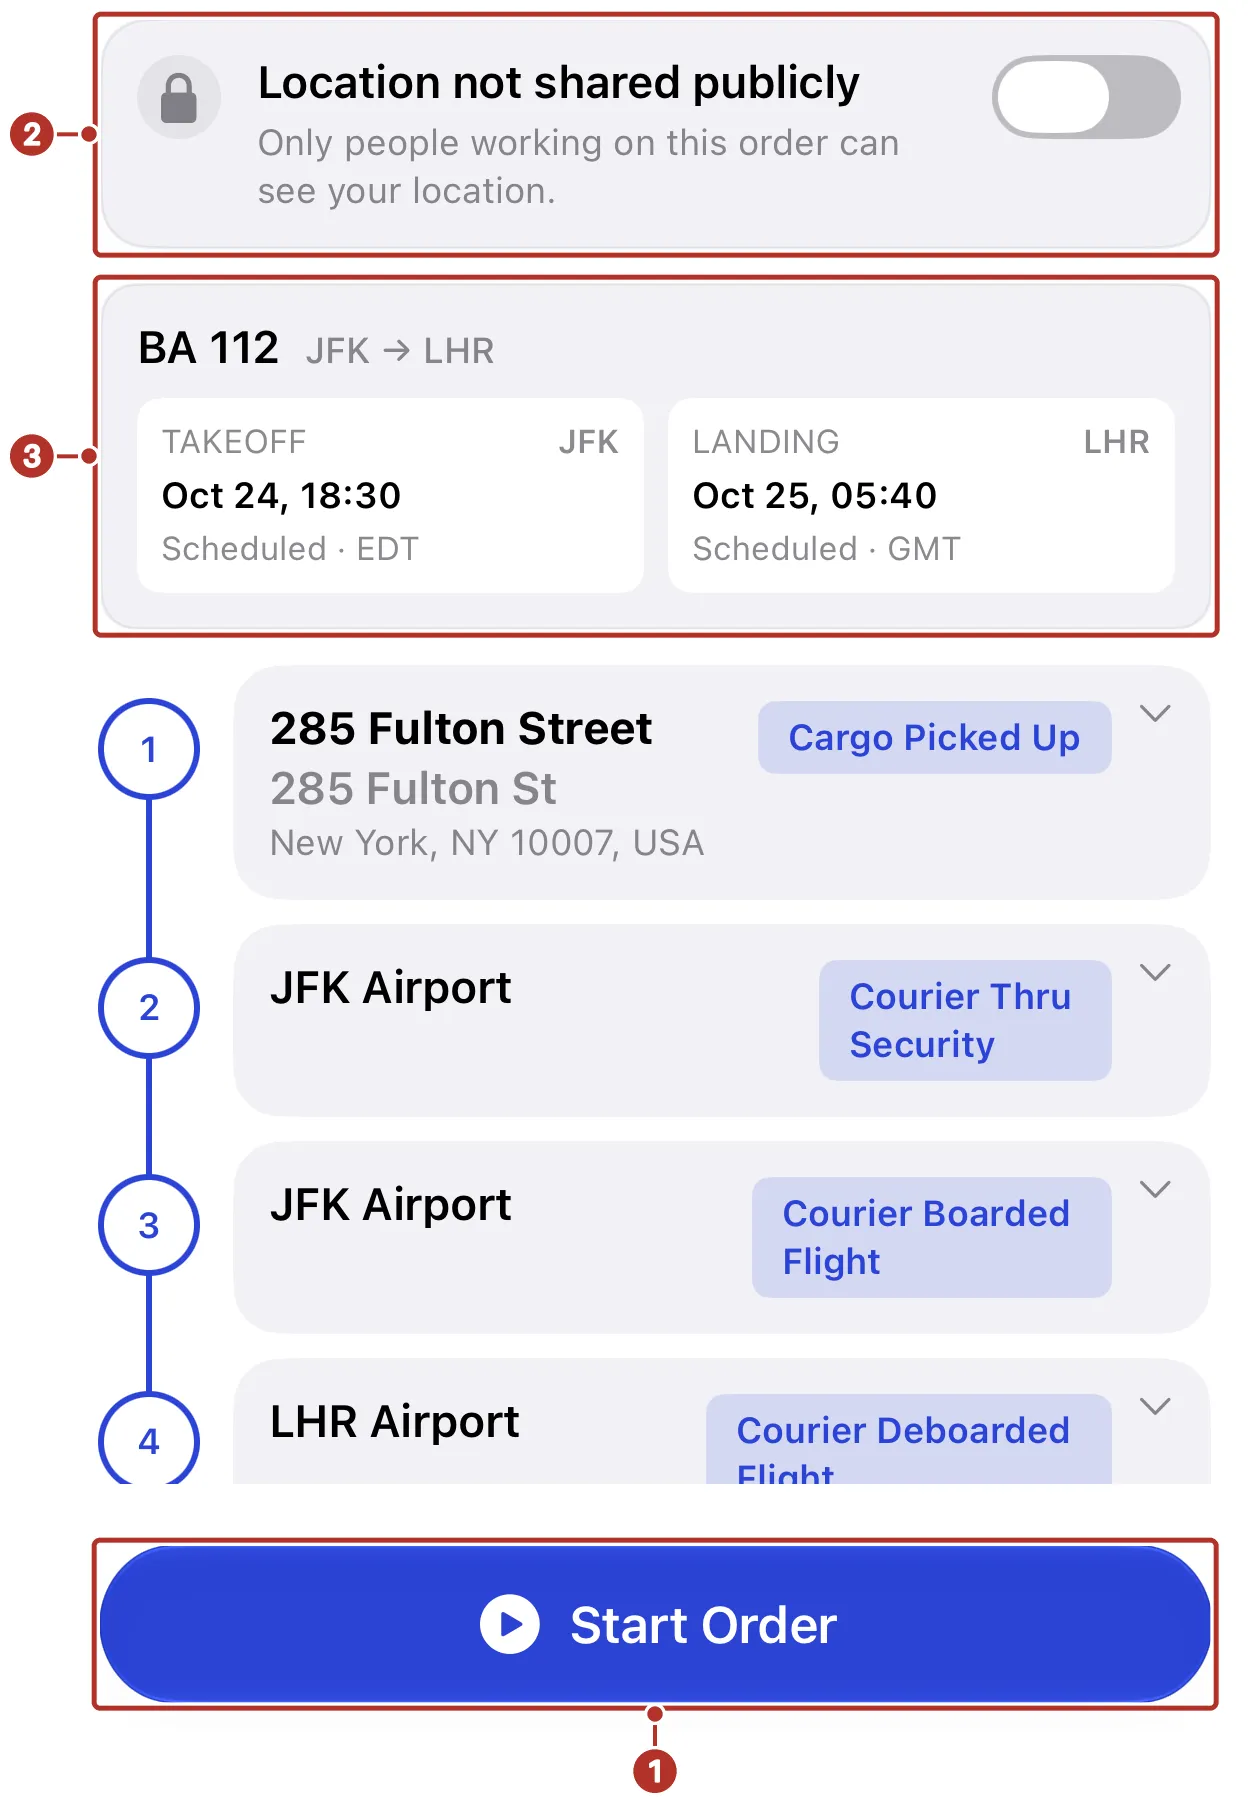
The task group screen for assigned work, with Start Order docked at the bottom. 1 Start Order button, 2 Location not shared publicly card with its Share live location publicly switch, 3 Flight card with Takeoff and Landing.
When you start, the app can ask Share Your Location? and explains that location sharing lets dispatch track your delivery progress. Enable Sharing 1 turns it on; Not Now 2 leaves it for later. See Live location for the sharing controls.
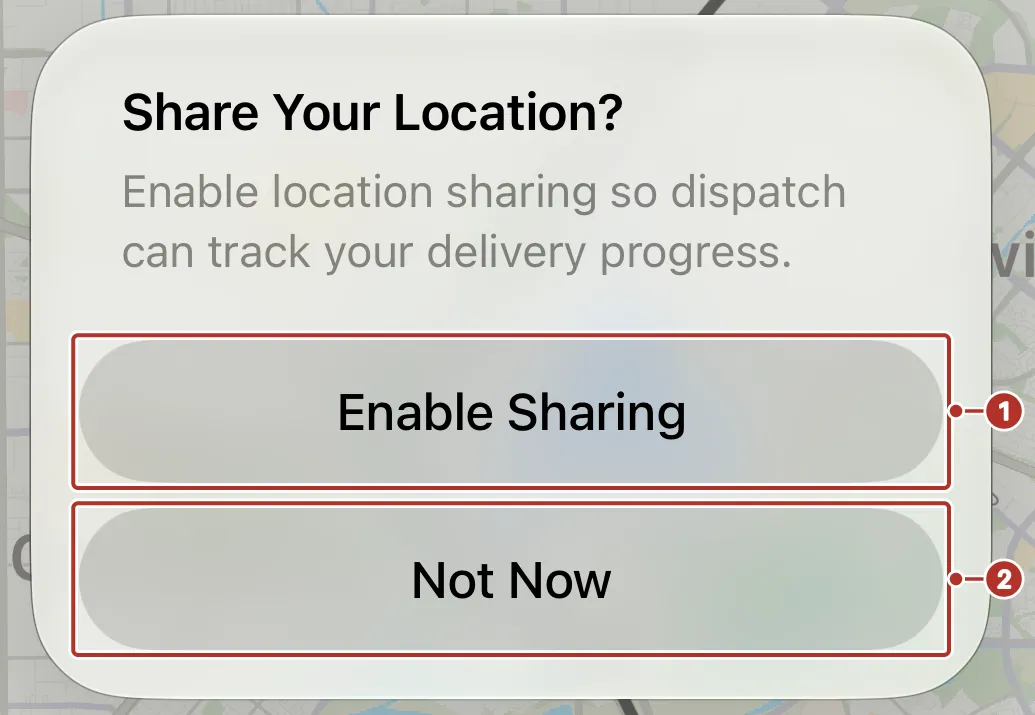
The Share Your Location? prompt after Start Order. 1 Enable Sharing button, 2 Not Now button.
On an order with ground stops, the Stops tab shows the Location not shared publicly card 1 above the stop cards 2. The docked button at the bottom, Navigate to Stop 3, acts on the current stop; its label changes with the next action, for example to Collect Signature once a signature requirement is open.
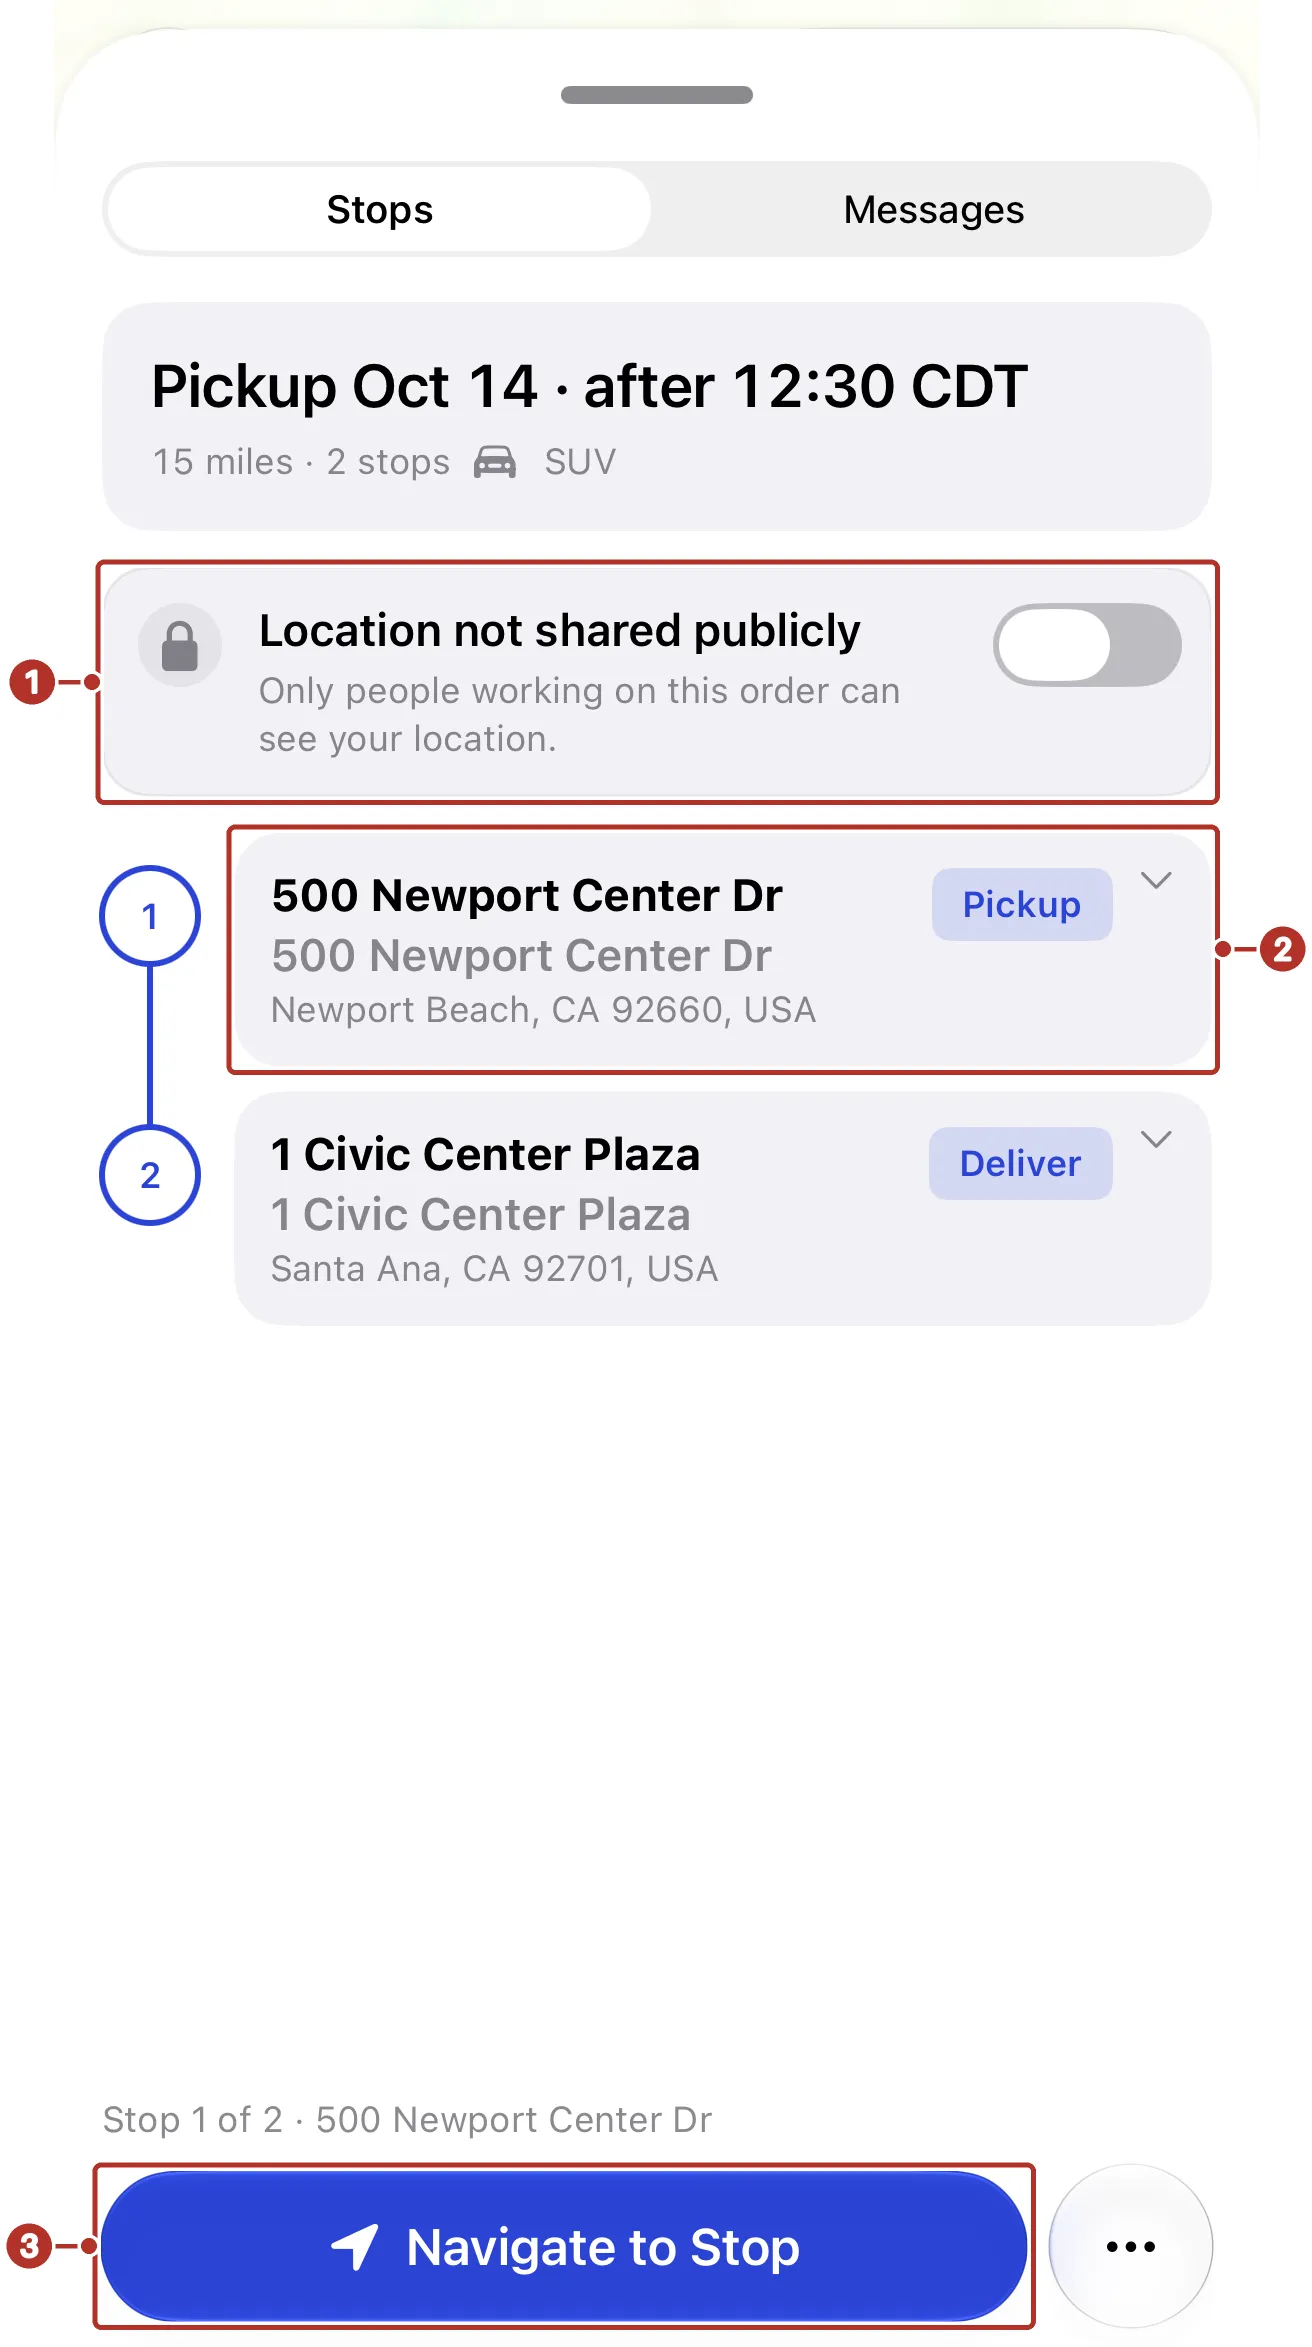
The Stops tab of a started order. 1 Location not shared publicly card, 2 first stop card, 3 Navigate to Stop button.
While the order is in progress the map shows the route as a line 1, Your Location 2 along it and a numbered pin for each stop 3. The Stops and Messages tabs sit in the sheet below the map.
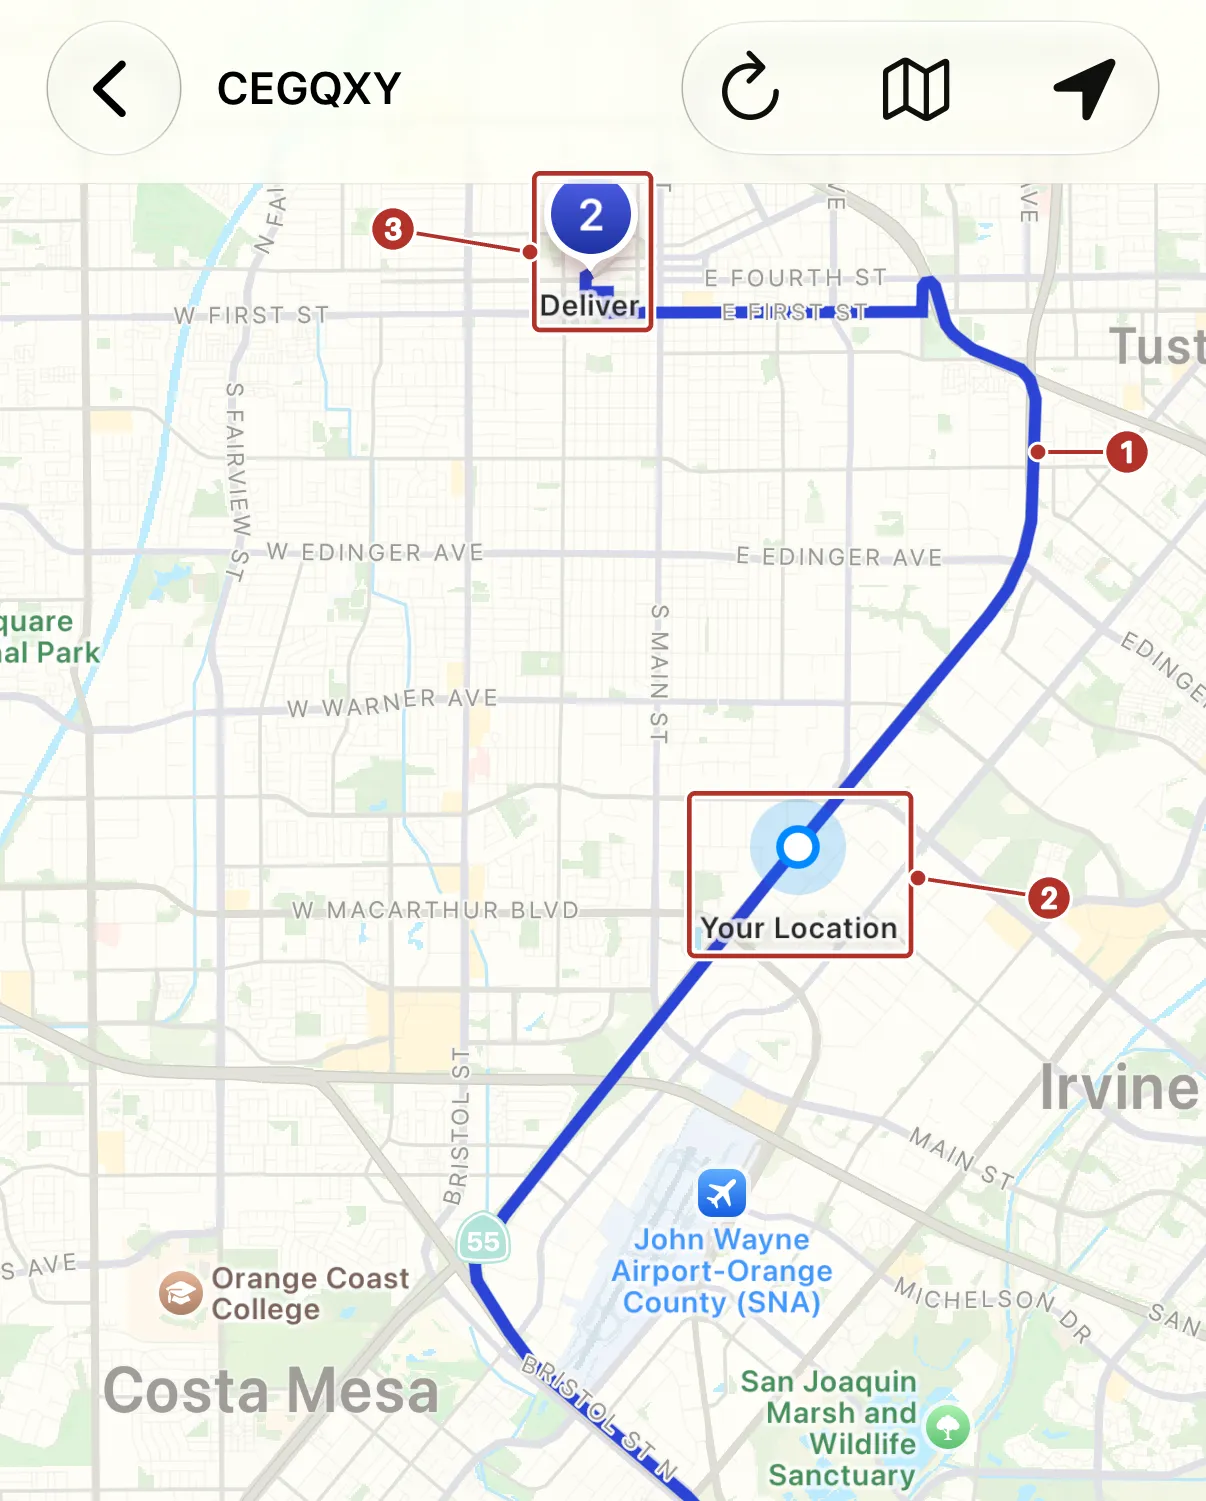
The order map in the driver app partway along the route. 1 route line, 2 Your Location marker, 3 Deliver pin.
5. Work the tasks
Follow the configured stops and instructions. Expand a stop card to read its Special Instructions preview. An expanded stop shows Proof of Pickup 1 (or the proof section for that task), the Details row 2, Start Wait Time 3 and Complete Stop 4 with a More stop actions menu beside it.
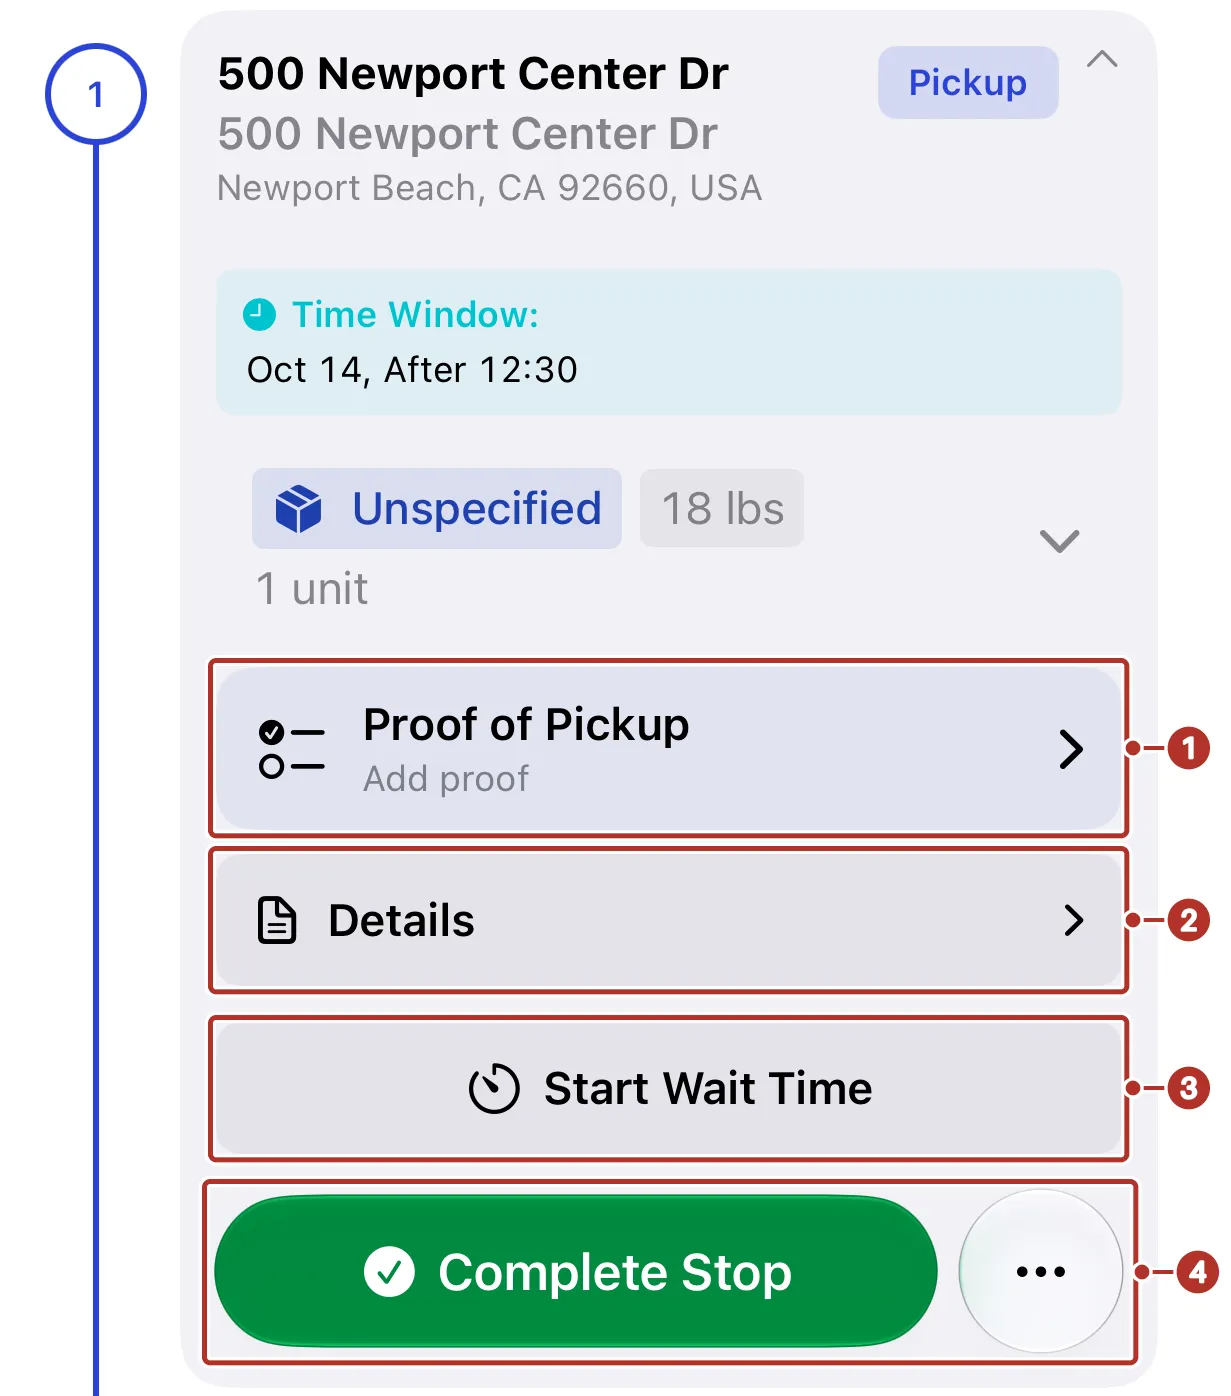
An expanded stop card on the Stops tab. 1 Proof of Pickup row, 2 Details row, 3 Start Wait Time button, 4 Complete Stop button.
Tap the stop or its Details row to open the Details sheet with the Address 1, Time Windows 2 and Cargo 3, plus instructions when the stop has them.
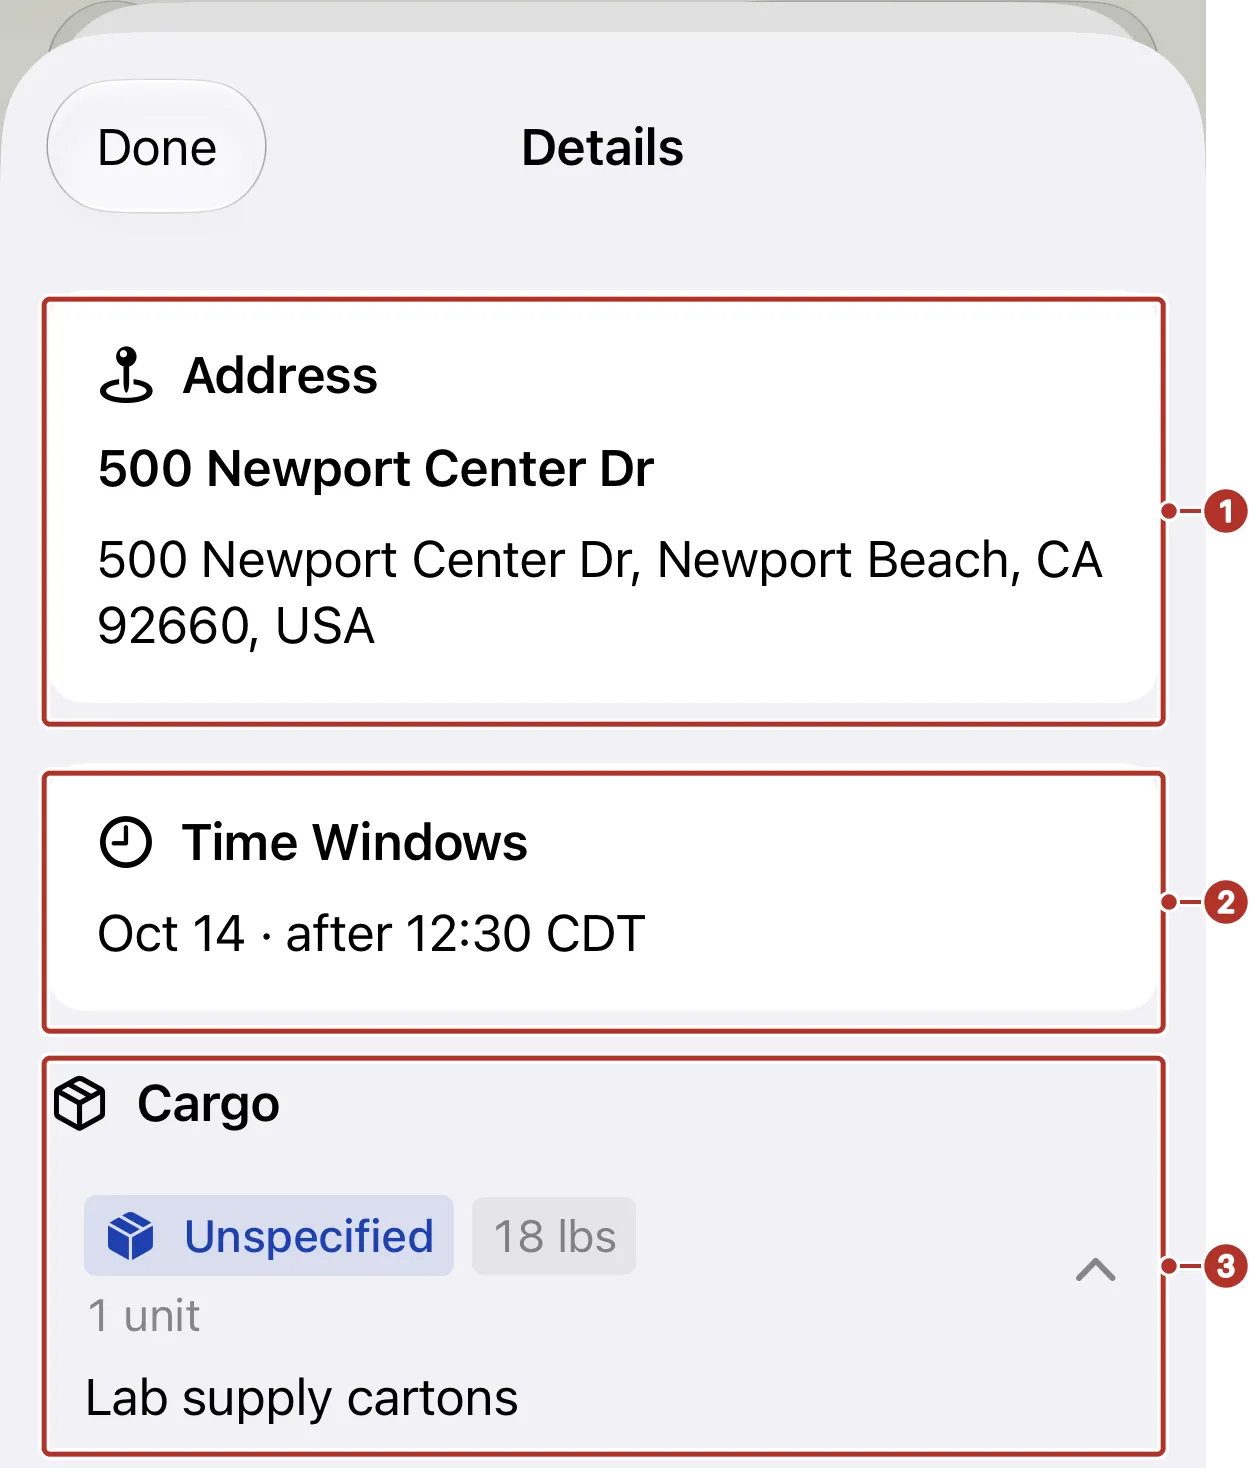
The Details sheet of a stop. 1 Address card, 2 Time Windows card, 3 Cargo section.
Open each task’s proof requirements and capture the requested evidence. Tap Complete Stop when the stop is done. The More stop actions menu beside it holds Attempt Task and Skip Task. The ellipsis button beside the docked action opens a longer menu: Complete Pickup 1 on a pickup stop, View Proof 2, Directions 3, Attempt Task 4 and Skip Task 5. If a required step cannot be performed, report the problem to dispatch instead of marking it done.
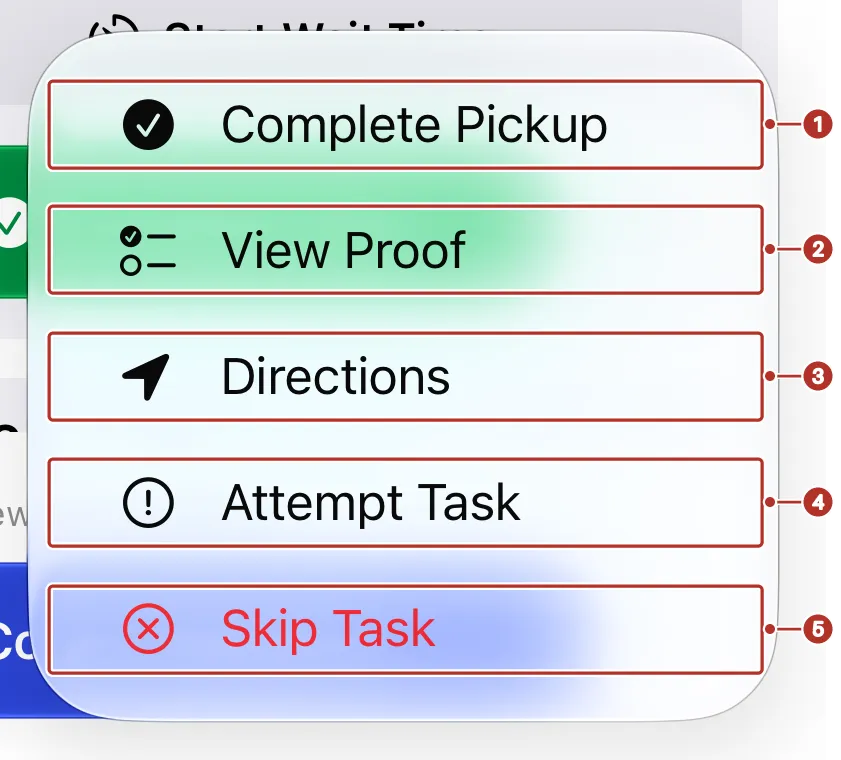
The menu beside the docked action on the Stops tab. 1 Complete Pickup, 2 View Proof, 3 Directions, 4 Attempt Task, 5 Skip Task.
Refresh after reconnecting and confirm the task group’s saved status. Local completion while waiting to sync can differ from dispatch’s current view. Open Orders and choose Completed under Filter orders to find finished work after its status has updated.
Working with weak signal
Previously loaded task data can remain available as cached data. Supported start/task/proof changes may wait to sync; offer responses are not interchangeable with those queued task changes. For a failed offer response, reconnect and verify the result before retrying.
Check Settings > Sync status for pending changes, errors and Retry. Wait for Nothing waiting to sync, then ask dispatch to verify the important assignment or completion. The absence of an offline banner only tells you connectivity changed; it does not prove the queue drained.
Avoid signing out, switching organization, discarding changes or uninstalling with unsynced work. See Proof of delivery and Troubleshooting.