

Drivers
Membership and driver eligibility
A team invitation adds organization membership. Driver execution also requires the appropriate driver profile and access for that organization. Check both before expecting the mobile app to show driving work. Use Add an Organization Member for team invitations.
Open the driver roster
Open Drivers. Search/filter the roster and review Driver Status 1, W2 2, Driver Availability, and Operator Availability. Driver and operator availability are separate values; inspect both when planning an assignment.
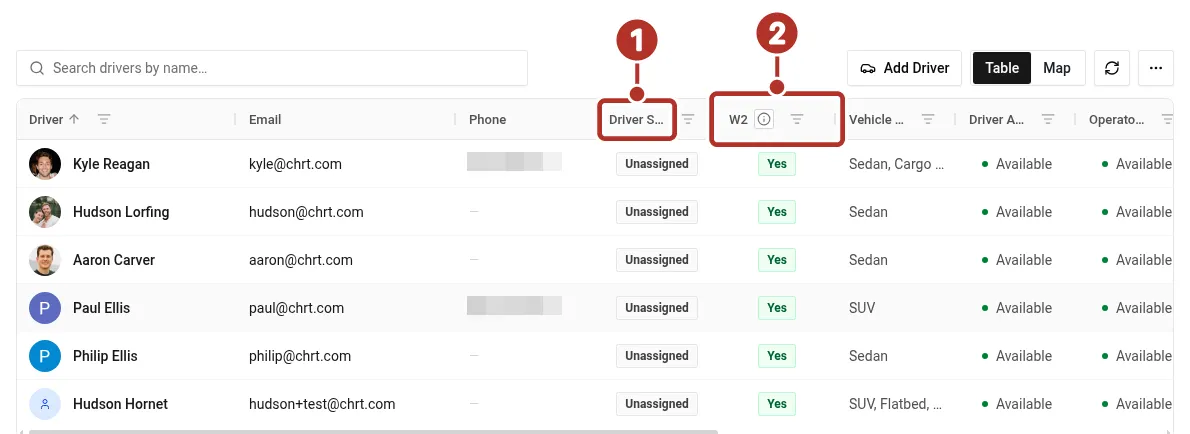
The Drivers roster. 1 Driver Status column, 2 W2 column.
Review a profile
Open a driver to review Details, Compliance, Map, Orders, Analytics, and Settings 1 where available. In Details, review the contact information 2 and Vehicle Types. In the example below, the profile header shows the Auto-assign · W2 3 badge. An authorized operator can submit the profile form, then reopen the profile to confirm the saved values. Review the required compliance documents separately. Saving contact or vehicle information does not confirm the driver’s classification or assignment eligibility.
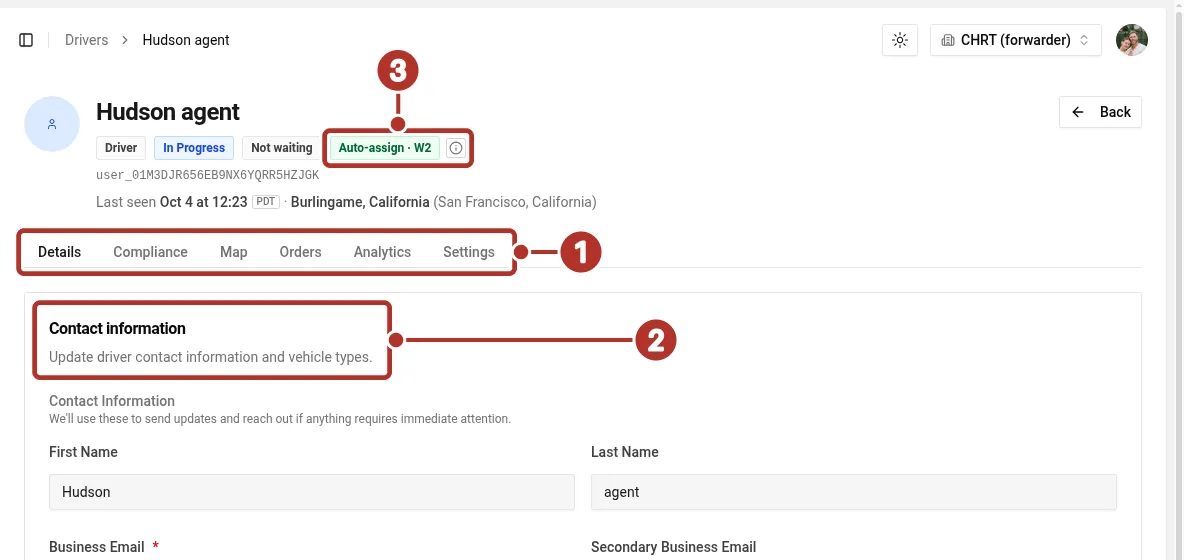
A driver profile on the Details tab. 1 tab row from Details to Settings, 2 Contact information card, 3 Auto-assign · W2 badge in the header.
Inspect compliance and settings
The driver profile’s Compliance 1 section shows a table 2 and an Upload evidence 3 control. The control does not establish compliance approval or assignment eligibility.
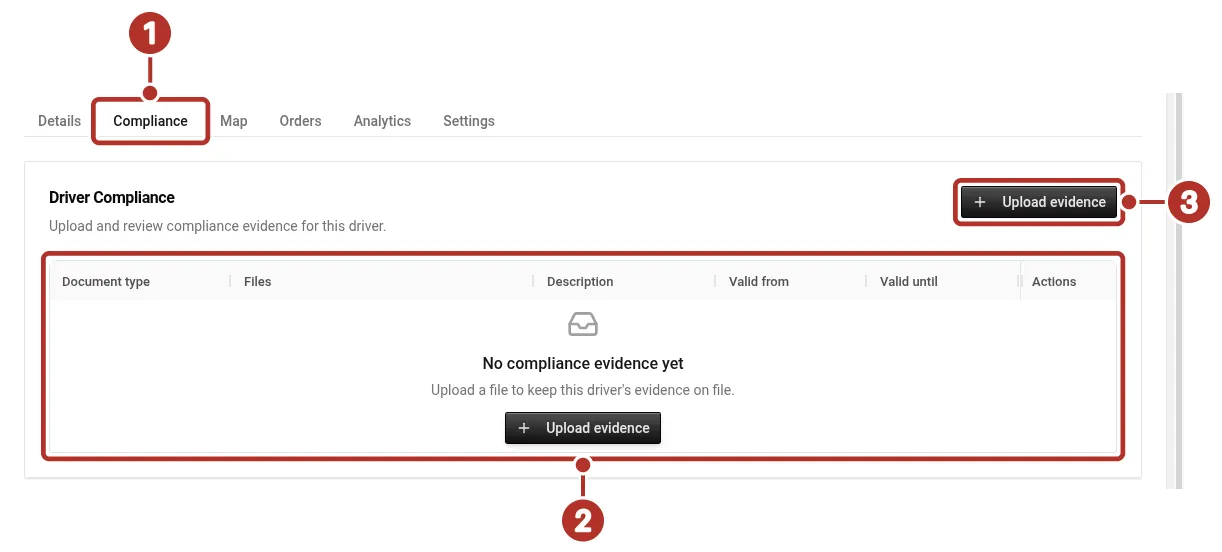
The driver profile’s Compliance tab. 1 Compliance tab, 2 empty document table (No compliance evidence yet), 3 Upload evidence button.
The same profile’s Settings tab holds the W2 driver (auto-assign) 1 switch under Driver classification and the Operator availability 2 menu, set here to Available.
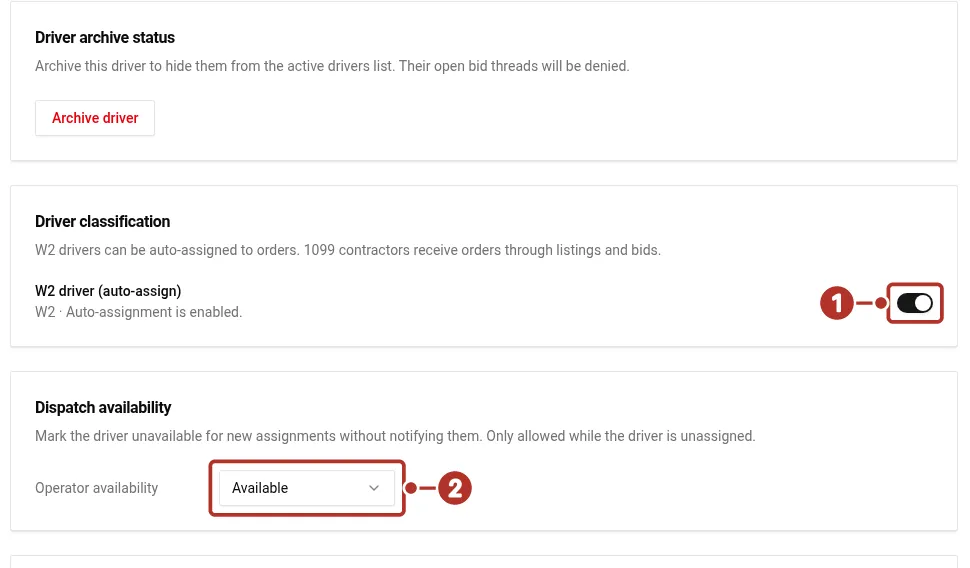
The driver profile Settings tab. 1 W2 driver (auto-assign) switch, 2 Operator availability menu.
Set the classification for dispatch
Have an authorized operator confirm the driver’s classification before assigning work. In the Drivers roster, review the W2 column, then open the driver and choose the Settings tab. Under Driver classification, the W2 driver (auto-assign) switch sets the value; it reads W2 · Auto-assignment is enabled. when on and 1099 contractor · Auto-assignment is off. when off. Only operators and higher can change it; others see a message saying so. Use the classification approved for that driver; do not change it just to bypass an assignment problem.
After you change the switch, reload the roster and profile. Confirm W2 is Yes or No as intended and that the profile shows Auto-assign · W2 or No auto-assign · Contractor. Report an error or a value that did not save before proceeding.
Immediate Assign or Reassign works when the assignee has agreed to direct assignment: a W2 driver with auto-assignment enabled, or a partner courier whose connection has Auto-assign turned on by that organization’s admin (see Auto-assign for partner couriers). For a driver, use an authorized W2 profile with auto-assignment enabled. Review Driver Availability and Operator Availability separately; W2 alone does not confirm that the driver can take this work. A visible assignment button is not a substitute for checking eligibility.
Otherwise send the work as a listing: Bid asks for a response, and Dispatch directly asks a driver to accept or deny. For a driver who should respond before assignment, follow Bidding and assignment requests. Its Dispatch directly mode sends an accept-or-deny request and is separate from immediate Assign. Check Dispatching for immediate assignment and the saved segment checks.
Review the latest location
Use the roster map view or the profile’s Map section. Check the Last seen 1 timestamp, the place name 2 and the Location tracked 3 coordinates. These values describe reported data; they do not guarantee the person is currently working or that location collection stops automatically between jobs.
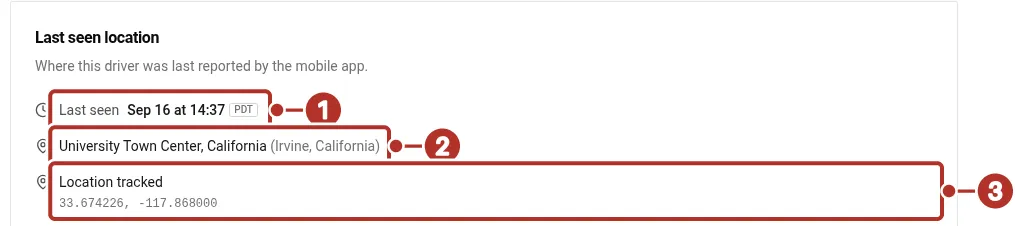
The driver profile Map tab, above the map. 1 Last seen time, 2 place name, 3 Location tracked coordinates.
Review recorded pings on an order
Open the assigned order’s Summary map and select Progress 1. In Map settings 2, use the Driver layer and enable See all pings to inspect individual recorded points 34. Select a point to read its timestamp. A grouped marker can be opened to inspect the points within it.
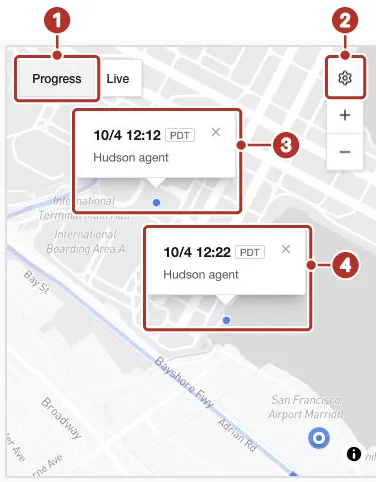
The order Summary map with Progress selected, showing separate recorded pings at 12:12 and 12:22 PDT on an order assigned to a W2 driver with auto-assignment and started in the iOS app. 1 Progress toggle, 2 Map settings gear, 3 recorded ping at 12:12 PDT, 4 recorded ping at 12:22 PDT. The locations are simulated; this shows saved tracking history, not continuous road travel or a guaranteed update interval.
Live shows the latest reported position. A route line or several latest-position markers does not establish a history of separate pings. Read the recorded points and their timestamps, and confirm that you are viewing the intended order and driver.
See Live Location for the driver’s sharing and permission controls.
Verify access before dispatch
Have the driver sign in to the correct mobile organization, then check the assigned work is available to that profile. Confirm assignment separately in the order Timeline. If the profile or job is missing, check organization membership, driver record, permissions, and the saved assignment.
For billing workflows and rate configuration, see Billing.
Related guides
- Getting Started
- Creating Orders
- Drivers
- Dispatching
- Marketplace
- Rate sheets — create the PPD rate sheets you set as driver defaults.
- Billing — see line items roll up into driver pay statements.