

Trackers on Orders
When you create a chrt order, you can attach one or more trackers to one or more of the order’s cargo items. After this flow, the tracker’s location shows up on the order’s Map tab next to the driver’s location, and condition data (temperature, light, shock) lands in the order timeline.
Before you start
- The order must have at least one cargo item. Trackers attach to cargo, not to orders or task groups.
- The tracker must be registered to your organization, or you must have its MAC address in hand to register it on the fly. See Supported devices for what hardware chrt supports.
1. Open Add Tracker on the order
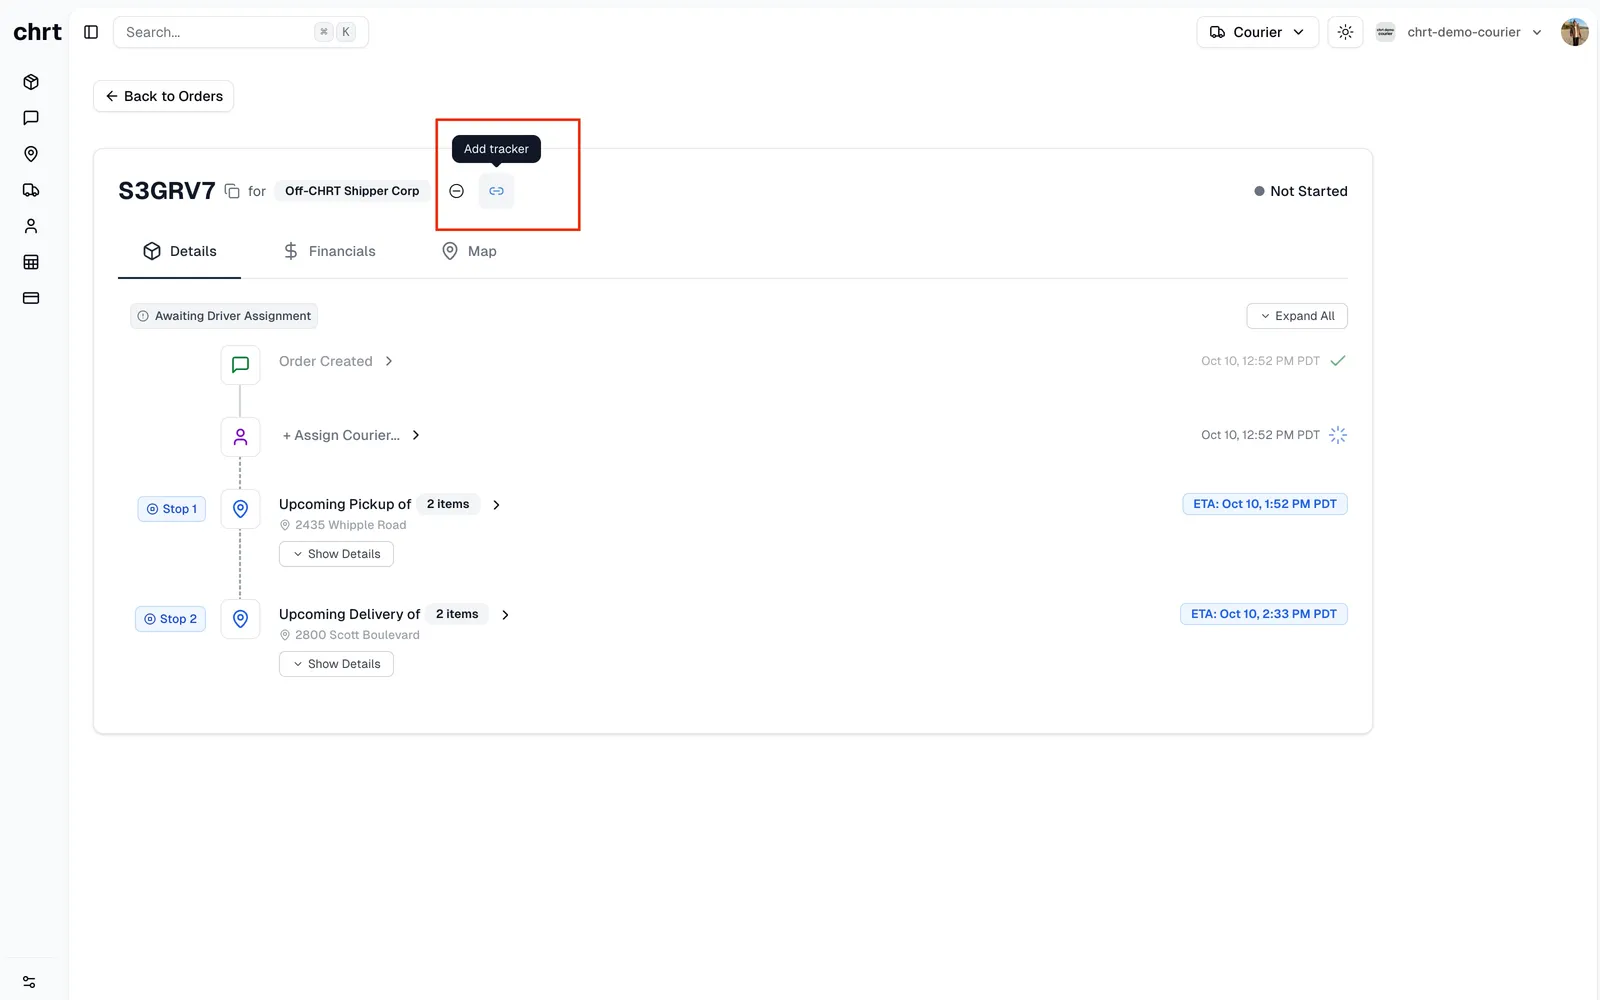
Open the order at chrt.com/orders and click into it. In the order header, open the actions menu and click Add Tracker.
2. Choose register-new or use-existing
The Add Tracker Device dialog gives you two modes:
- Register a new device. Enter the Device MAC address (printed on the tracker hardware) and pick the cargo to link it to.
- Use an existing device. Pick a device that is already registered to your org and is not currently on a session or linked to active cargo.
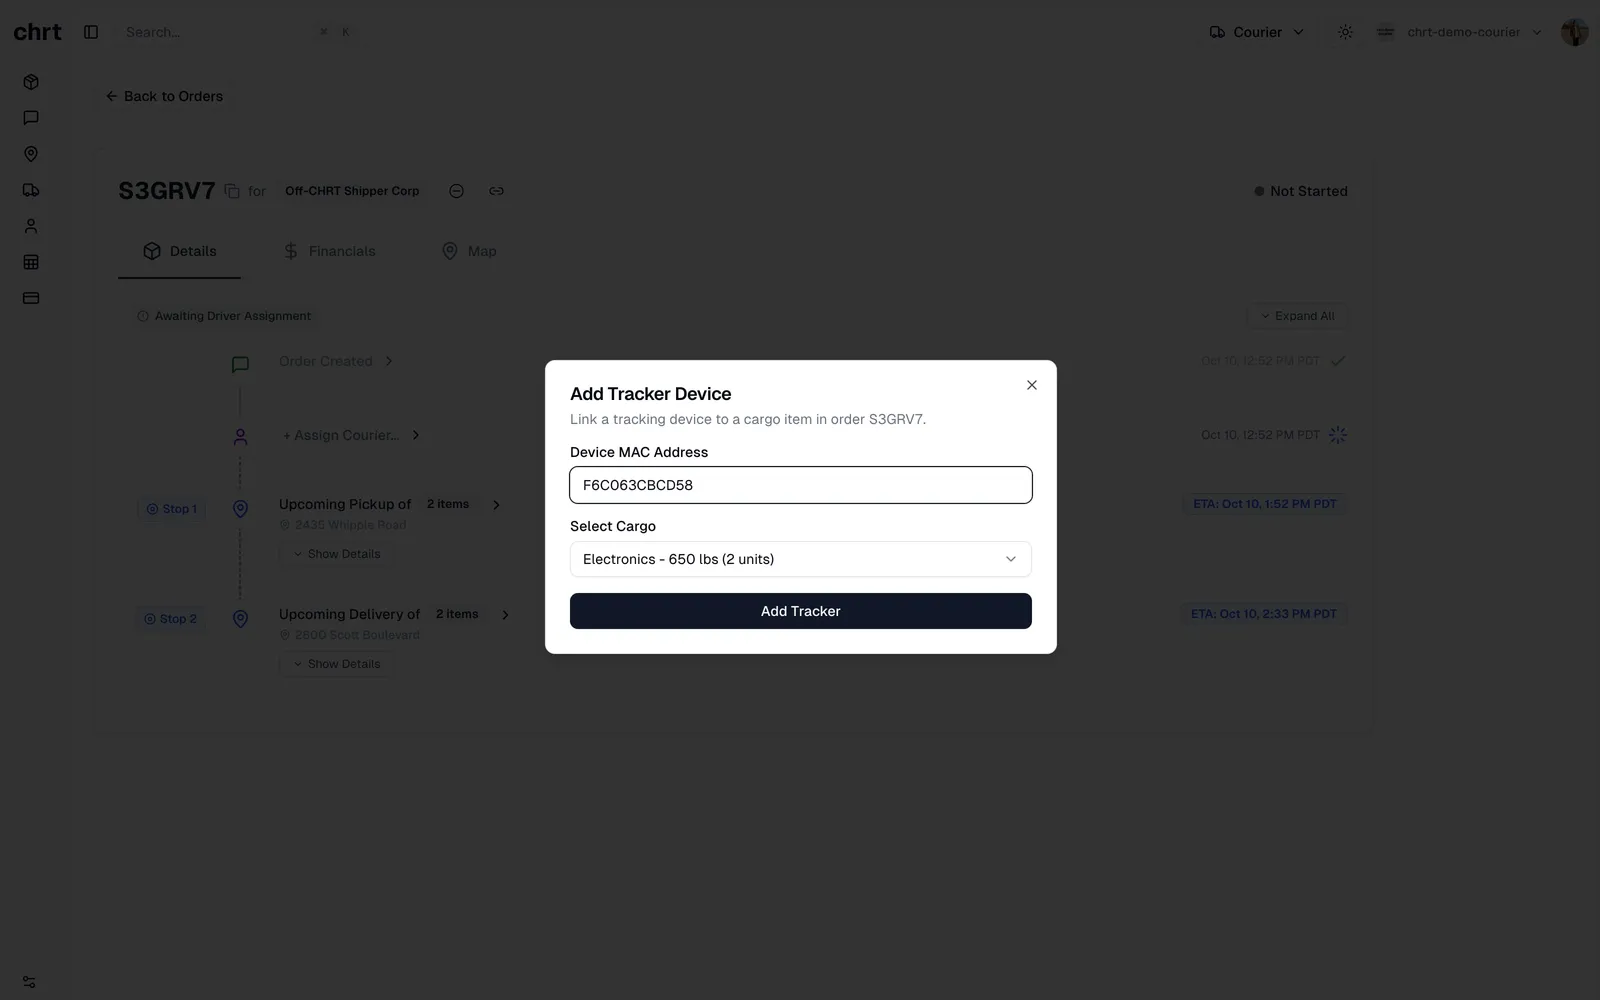
If your cargo combobox shows no options, the order doesn’t have cargo yet. Add cargo to the order draft (see Creating shipments) before linking a tracker.
3. Confirm and save
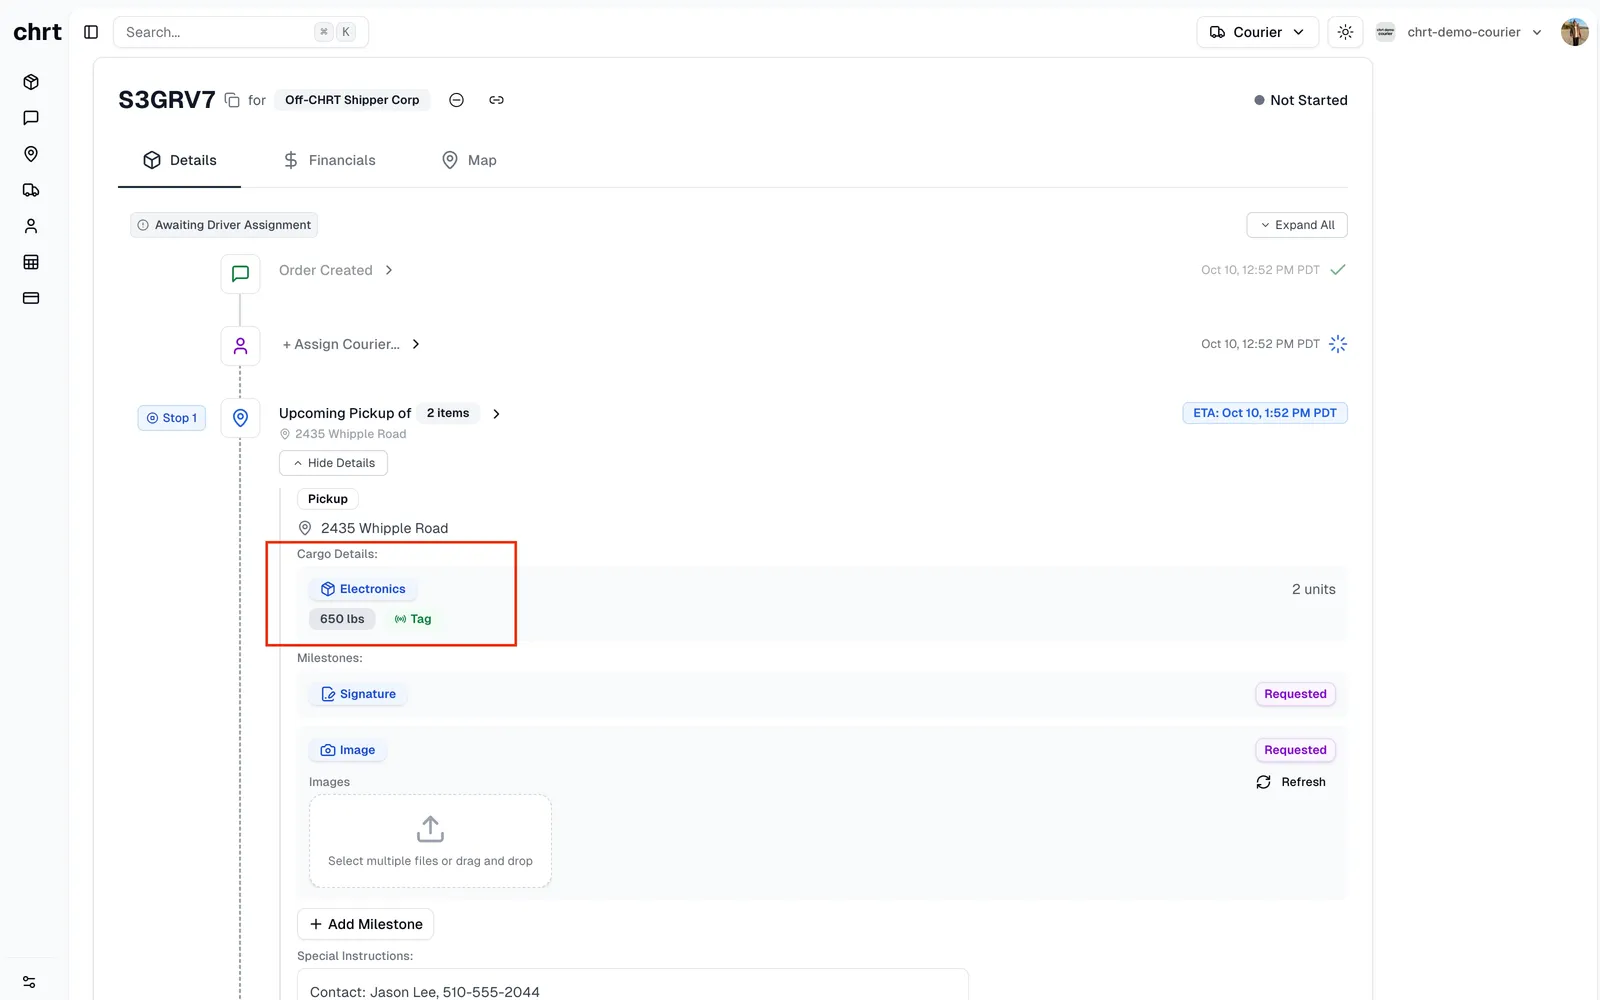
Click Register Device (or Confirm for an existing device). The tracker now appears in the cargo item’s details, and the cargo row shows its linked device.
4. View the merged map
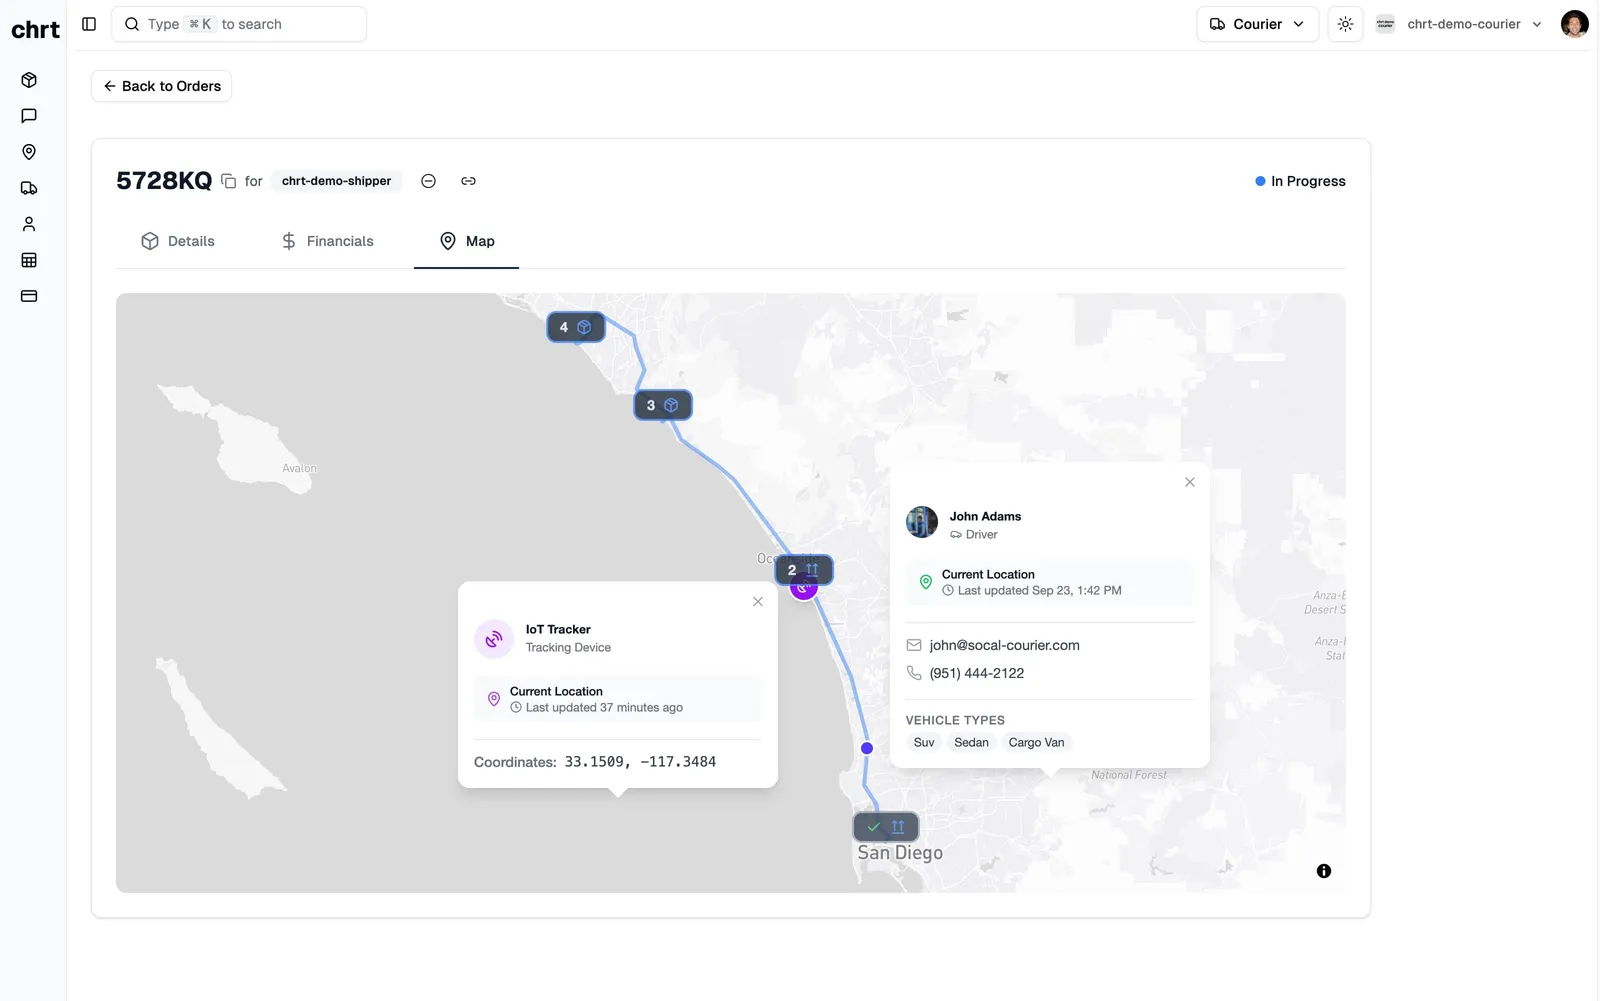
Open the order’s Map tab. The map renders every active marker for this order on the same canvas:
- The driver’s location (from the chrt driver app), once they accept a task and grant location permission.
- Every tracker linked to cargo on the order, including any Tive device imported via the integration.
Click the Layers button in the top-left to toggle the Route layer (planned segments and stops) and the Tracking layer (live driver and tracker pings) independently.
At least one layer must stay enabled. If you turn off Route, the map shows only the live tracking. If you turn off Tracking, you see the planned path with no live markers.
5. Swap or remove a tracker mid-order
To swap a tracker (for example, because a Tive battery died):
- Register the replacement device if it’s new — see Standalone trackers.
- On the order, open Add Tracker again and link the replacement to the same cargo item.
- The old device’s history stays on the cargo’s timeline; the new device picks up from the next ping cycle.
To remove a tracker without replacing it, open the cargo item’s detail panel and unlink the device. The device returns to your idle pool on Devices and is available for the next session or order.
Unlinking a tracker from cargo does not delete its session history. If you’ve shared the session publicly, the public URL keeps showing the recorded path until you terminate or delete the session.
How to know it worked
- The linked device appears in the cargo item’s detail panel within seconds.
- The first ping from a newly registered tracker can take up to about 15 minutes to appear on the order’s Map tab.
- Condition events (low battery, temperature excursion, shock) land in the order timeline once telemetry arrives.
If something looks different
- Add Tracker is disabled. The order has no cargo yet. Add cargo first.
- Tracker doesn’t appear on the Map tab. Confirm the Tracking layer is enabled in the Layers popover, and wait up to 15 minutes for the first ping.
- You see a Tive device that isn’t on your linked Tive account. Confirm the integration is enabled — see Integrations — and that the device shows up under Integrations > Devices.
- Contact trackers@chrt.com for hardware questions or hi@chrt.com for everything else.
Related guides
- Supported devices — the device matrix.
- Standalone trackers — track without an order.
- Battery and data — swap a dead Tive mid-shipment.
- Integrations — link Tive shipments to orders.
- Tracking concepts — how chrt models devices and pings.
- Orders concept — orders, task groups, and cargo.