

Standalone Trackers
You can use a tracker on your own shipments (without placing a chrt order) by registering the device to your organization and creating a tracking session. The Devices page lists every device registered to your org. From there you can add hardware, start sessions, and jump to active tracking.
You can manage devices and sessions in our UI at chrt.com or through our API. For programmatic access, see the Tracker API page.
Prerequisites
You will need to have a chrt account to use our trackers.
- Sign up for an account: chrt.com
- Learn about our available devices and pricing: chrt.com/trackers
- Request devices: trackers@chrt.com
Using Your Tracker
1. Devices table and Register Device
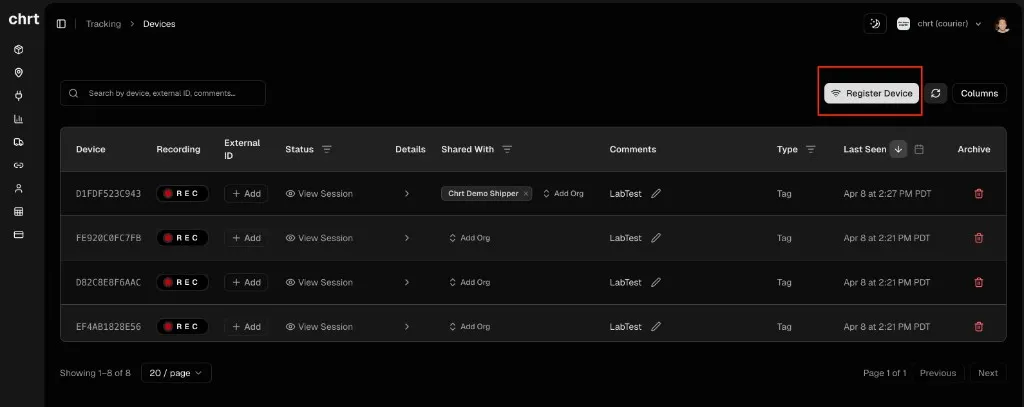
Open chrt.com/tracking/devices. The table shows each device’s ID, recording state, optional external ID, session status, and more. To add a device, click Register Device in the top-right corner. You will be asked for the 12-character device identifier (the MAC address printed on the hardware).
2. Register Device form
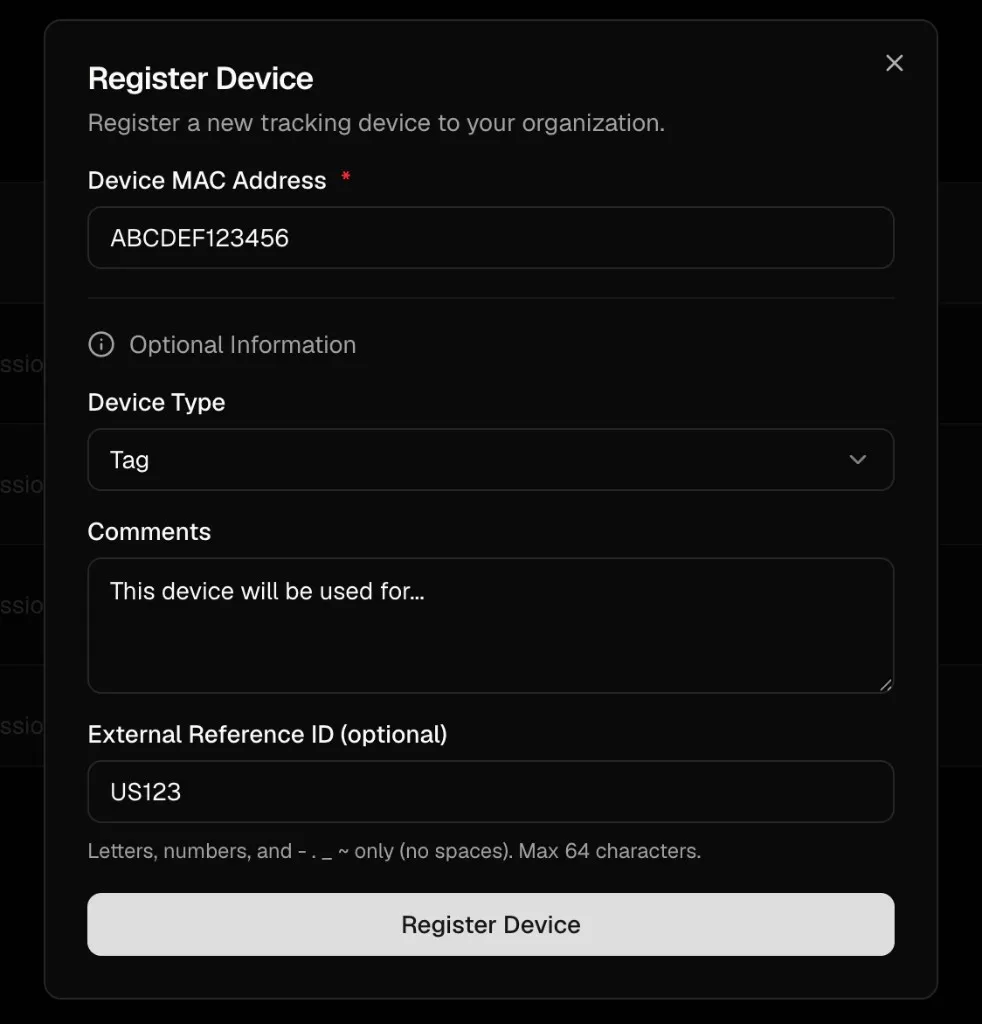
In the Register Device dialog, enter the device identifier. Optionally add an External reference ID (letters, numbers, and - . _ ~ only, up to 64 characters), Comments, and choose whether the hardware is a Tag or Label. Click Register Device to save.
3. Create a session from the devices table
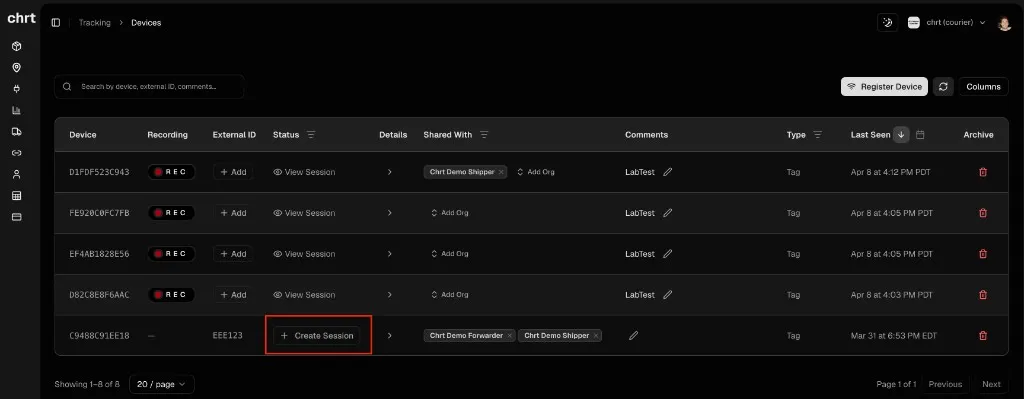
When a row shows no active session, use + Create Session in the Status column to start a new tracking session for that device. (Devices that are linked to cargo or already in an active session cannot start another session from here.)
4. Session options and automatic termination
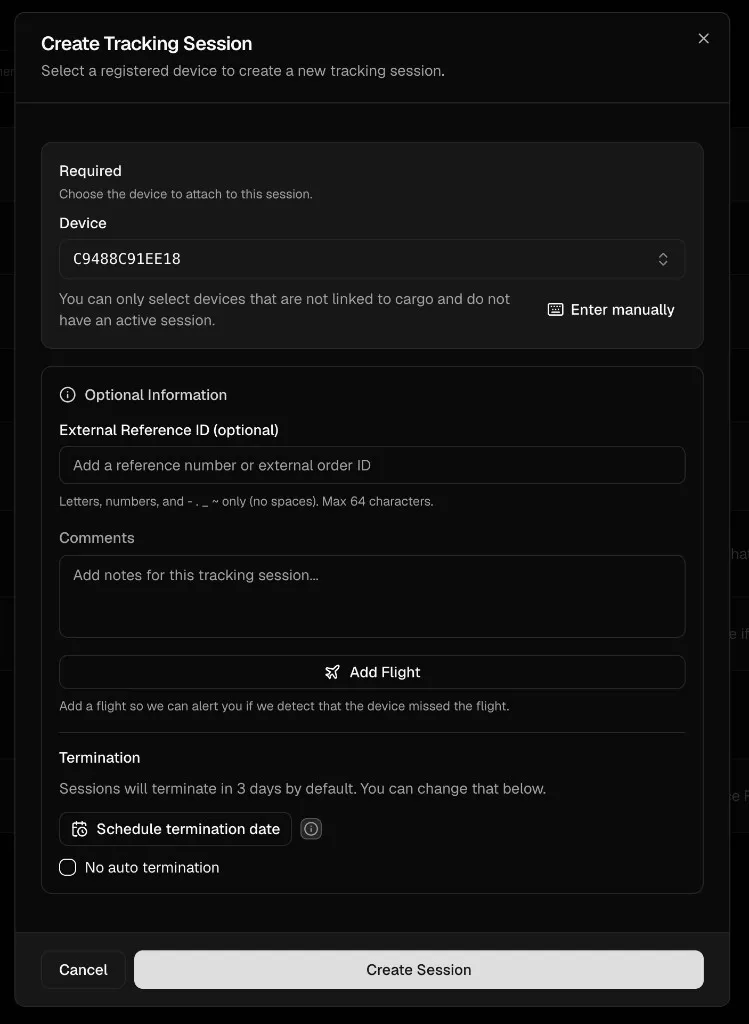
The Create Tracking Session flow lets you pick the device (if you did not start from a specific row), optional external reference and comments, and optional flight details. By default, sessions end after 3 days. You can Schedule termination date for a specific end time, or choose No auto termination to keep the session open until you end it manually. Longer or open-ended sessions may incur additional tracking charges depending on your subscription.
5. First pings, map view, and Show History
After you create a session, it can take up to about 15 minutes for the first batch of location pings to appear. Give it a few minutes; you should then see the device on the map with REC indicating recording. If nothing appears after 30 minutes, contact trackers@chrt.com.
Use Show History to list all pings for the session and open a time range slider so you can focus on when and where the device was at a specific time.
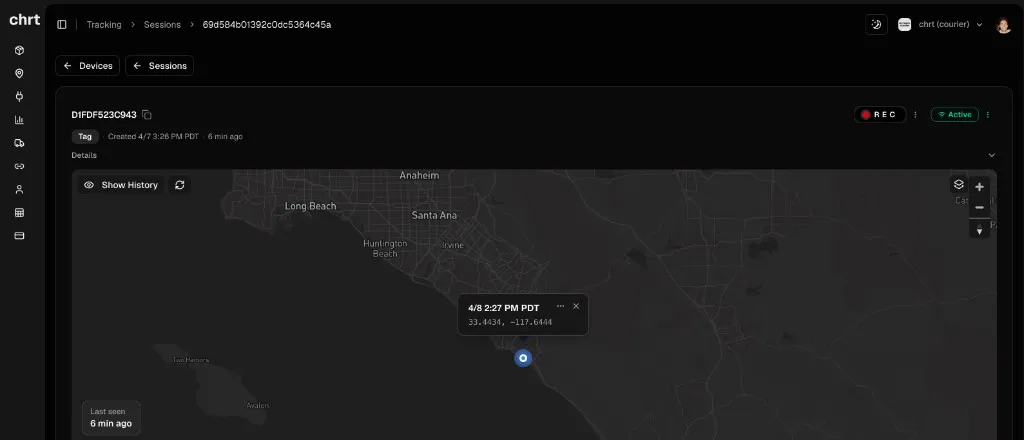
6. Pause and resume, flights, and public sharing
Open the menu next to REC and choose Pause to stop recording pings for this session. To start again, open the same menu and choose Resume—you can pause and resume at any time while the session is still Active.
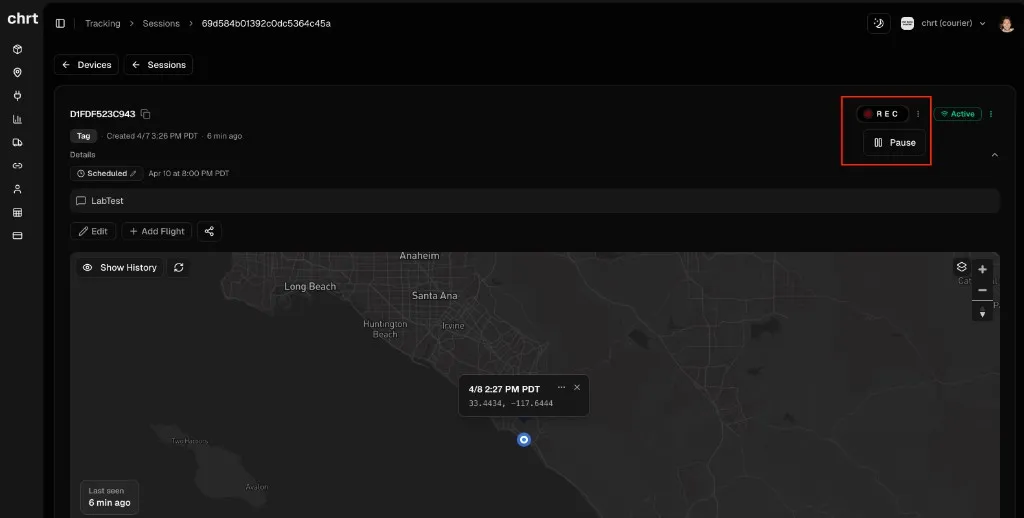
In the Details section of the session page you can Edit session fields, assign flights, and start the public link flow. You can assign one or more flights to a tracking session to receive alerts related to that flight (for example, if we detect the device may have missed a flight). Use + Add Flight to add them here or when you first Create Tracking Session.
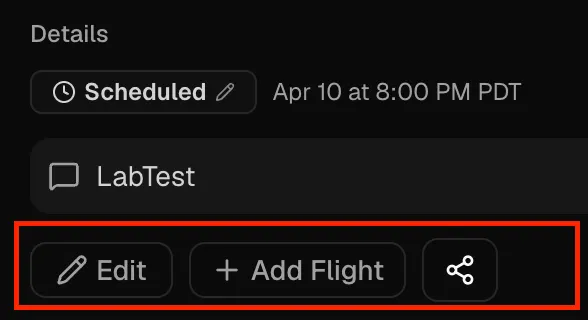
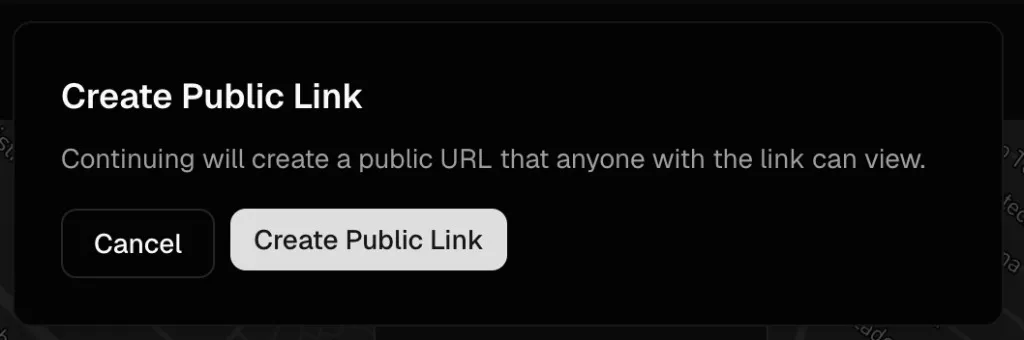
You can also make the session public. A public session can be shared with anyone, whether or not they have a chrt account—they only need the URL. On the session page, click Share Public Link (or the share control that exposes it).
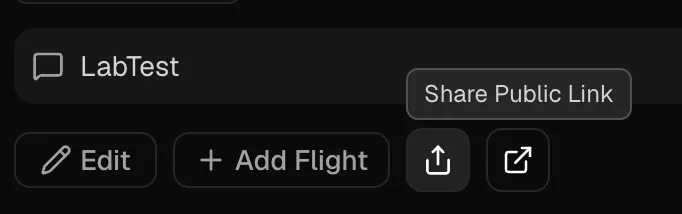
Confirm in the Create Public Link dialog to generate the URL. Once a session is public, it stays public until the session is removed (see the warning below).
7. Terminate a session
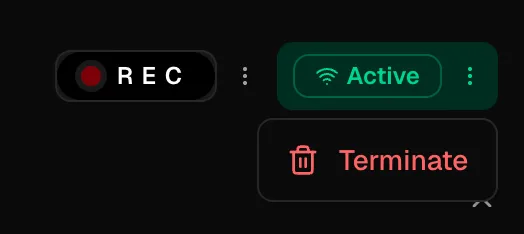
Click Active (and its menu) and choose Terminate to permanently stop recording for this session. You cannot resume a terminated session; to track the same device again, return to Devices and create a new session.
8. View terminated sessions
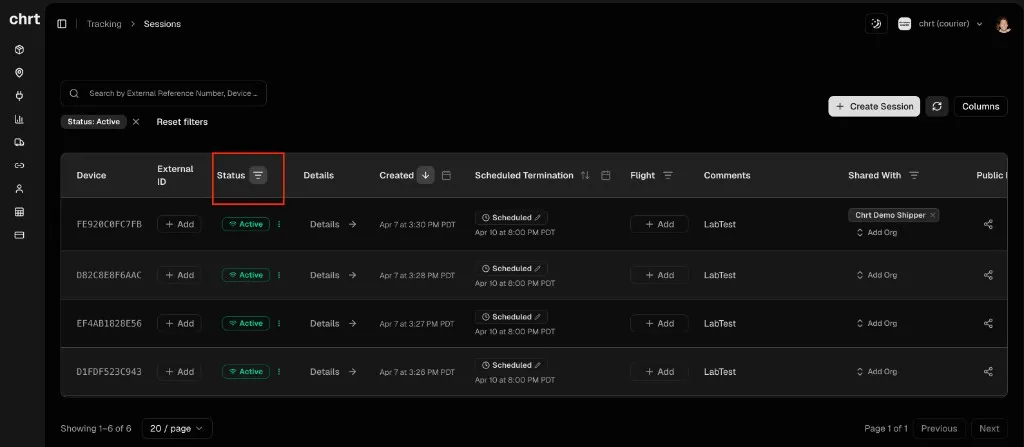
On chrt.com/tracking/sessions, use the Status column filter (or the filter chips above the table) and select Terminated to see ended sessions alongside active ones.
Public Tracking Map
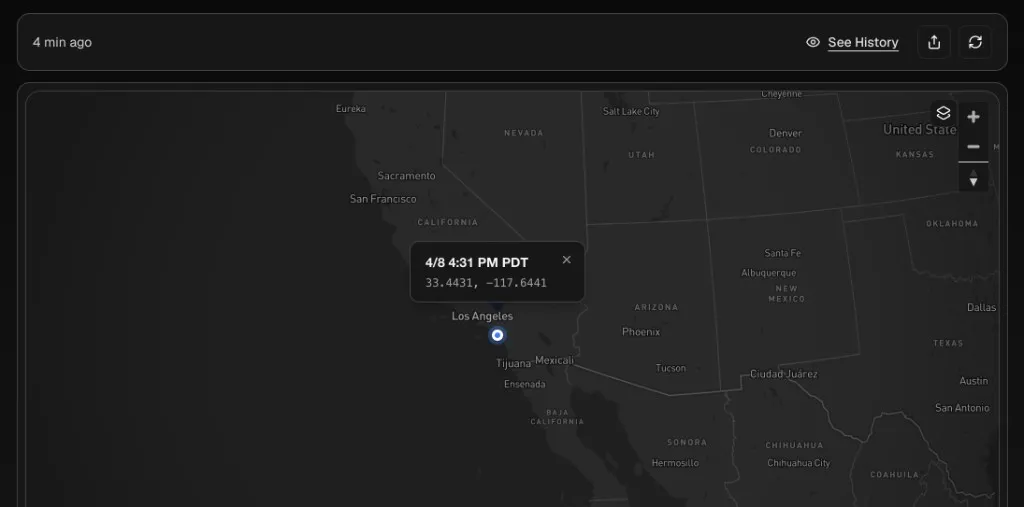
The public tracking map is the page recipients open from a public link. It shows the device’s current position on the map and lets viewers use See History (or equivalent) to review where the device has been during the active session—the same idea as Show History on the signed-in session view, without requiring a chrt login.
For API details and restrictions on public sessions, see Making a Session Public.
Additional Details on Tracking Sessions
A tracking session records location and metadata from a registered device for as long as the session is active (subject to your termination settings and subscription).
Sessions allow you to do all of the following:
- View the device’s location and metadata in real time on the map
- View full ping history and narrow the time window with Show History
- Create a public link to share tracking with your customers
- Pause and resume recording at any time while the session is active
- Terminate the session to stop recording permanently for that session
- Delete the session to remove recorded data permanently (where supported)
Creating a session
Create a session from the devices dashboard (+ Create Session on a row) or from the sessions dashboard (+ Create Session). For the API equivalent, see Tracker API.
Making a session public
Make a session public from the sessions dashboard or from the session’s detail page. The page exposes a button to view the public session page and to copy the public link. For the API equivalent, see Tracker API.
Once you make a session public, you cannot make it private again. Your only option is to terminate or delete the session.
Deleting a session
Delete a session from the sessions dashboard or from the session’s detail page. A public API endpoint for deletion is not currently documented — contact trackers@chrt.com if you need programmatic deletion.
Related guides
- Supported devices — Tive Tag vs. Label, phone, and OBC.
- Trackers on orders — attach a tracker to cargo on a chrt order.
- Sharing — share a session with a connected org.
- Battery and data — battery reporting and recovery.
- Tracker API — programmatic access to devices, sessions, and telemetry.