

Choose Organization Type
Before you start
Select the organization you intend to configure. Organization type controls which workflows and setup steps apply; it is separate from your own membership role.
Choose the type
-
Review Company name and Organization handle 1.
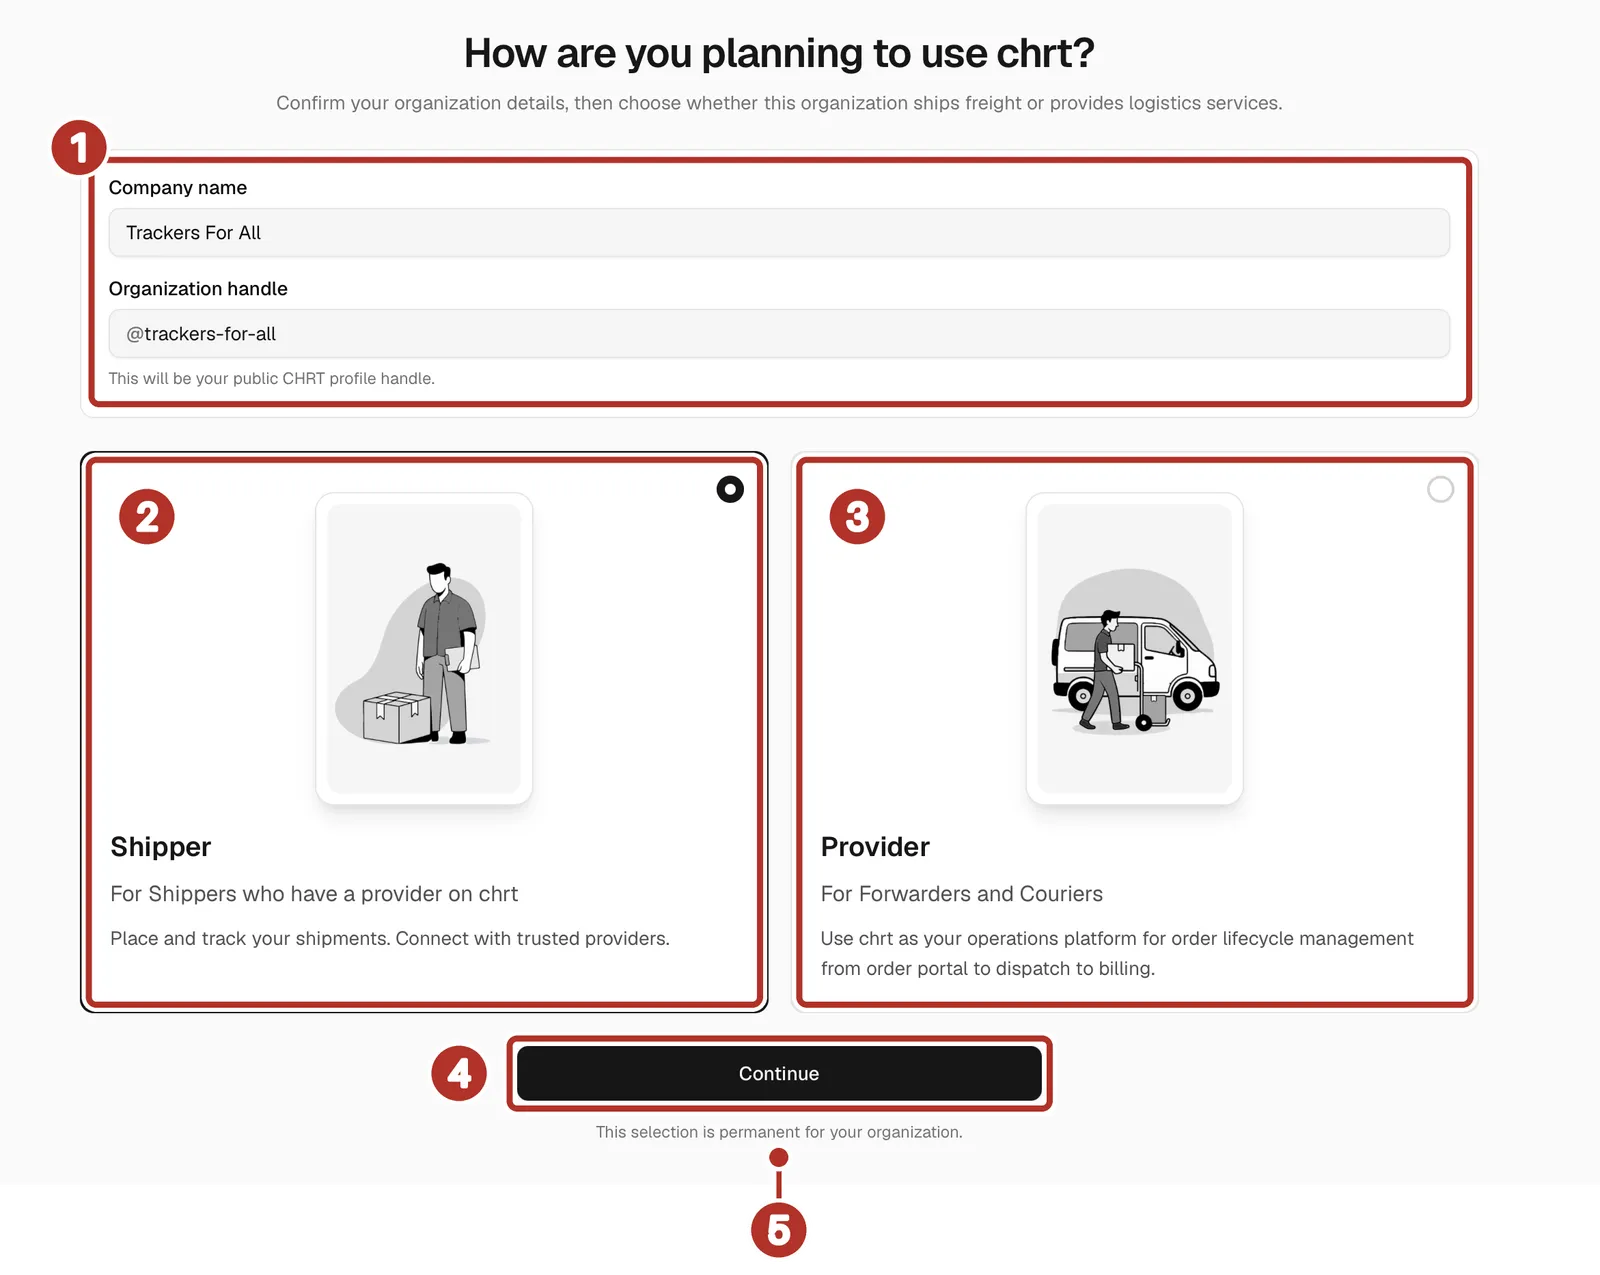
Organization type setup screen, shown before the type is saved. Shipper is selected here only as an example. 1 Company name and Organization handle, 2 Shipper card, 3 Provider card (For Forwarders and Couriers), 4 Continue, 5 the note This selection is permanent for your organization. under Continue.
-
Choose Shipper 2 when the organization requests shipments from providers.
-
Choose Provider 3 when it performs or coordinates logistics services. Couriers and freight forwarders use this option.
-
Review the handle 1 and any availability error.
-
Check your choice, then use Continue 4 when the form is valid and follow the next setup screen. The screen says This selection is permanent for your organization. 5
The default selection can depend on how you entered setup. Review it rather than treating the selected card as a recommendation for your company. Handle availability is checked during setup; an entered value alone does not prove it was saved.
Confirm setup
After continuing, check the active organization’s saved name, handle and type. Complete the relevant onboarding checklist. Once the type is saved, this selection screen no longer opens for that organization, and the app has no setting to change the type afterward. If you cannot finish setup, contact support before adding real work.
See Create or select an organization, Roles and Getting started.
Provider setup
Provider setup can include subscription checkout. Review pricing or open the subscription page if you need to confirm plan details.
Provider organizations continue into the provider setup flow. Depending on your plan, you may be sent through subscription checkout before entering the app. After access is available, the provider checklist guides you through inviting a driver, adding a customer, setting up a rate sheet, and creating an assigned order.